Optimizing SuiteCRM Views for Enhanced Business Processes: Tailoring to your needs
Learn how to tailor SuiteCRM views to your specific needs for improved efficiency and productivity.
In today’s guide, we’ll explore the key steps to fine-tuning data and views within your SuiteCRM system to align with your unique business needs, specifically focusing on customizing SuiteCRM Views.
Assuming your SuiteCRM system is up and running with some test records, you may encounter a common challenge – the displayed data doesn’t quite fit your business requirements. The good news is that SuiteCRM provides an easy and efficient feature to configure data, views, and displays according to your specific needs.
Before we go into the details, it’s essential to grasp the differences in SuiteCRM Views – List, Detail, Create/Edit. Each serves a different purpose in presenting and managing your data.
In this video, we’ll guide you on SuiteCRM customize views to improve your business processes and tailor them according to your specific needs.
Now, let’s proceed with the essential steps to configure these views effectively.
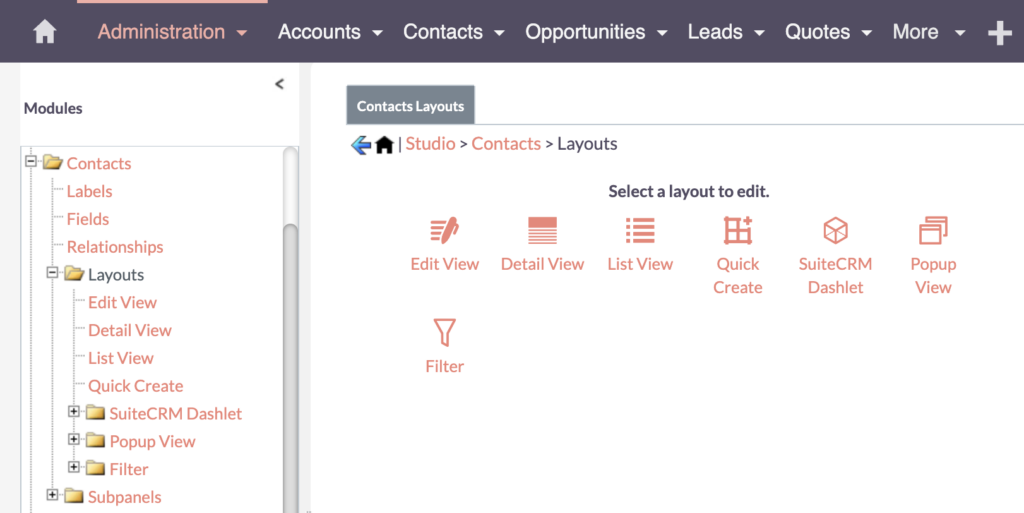
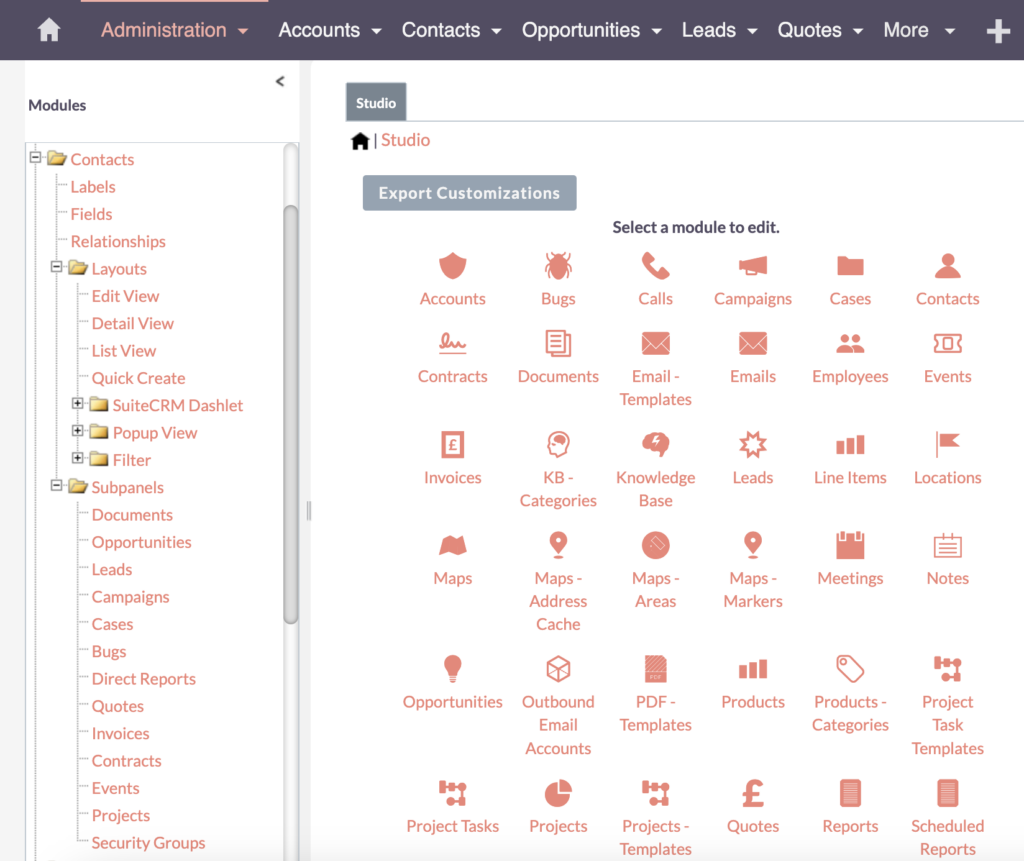
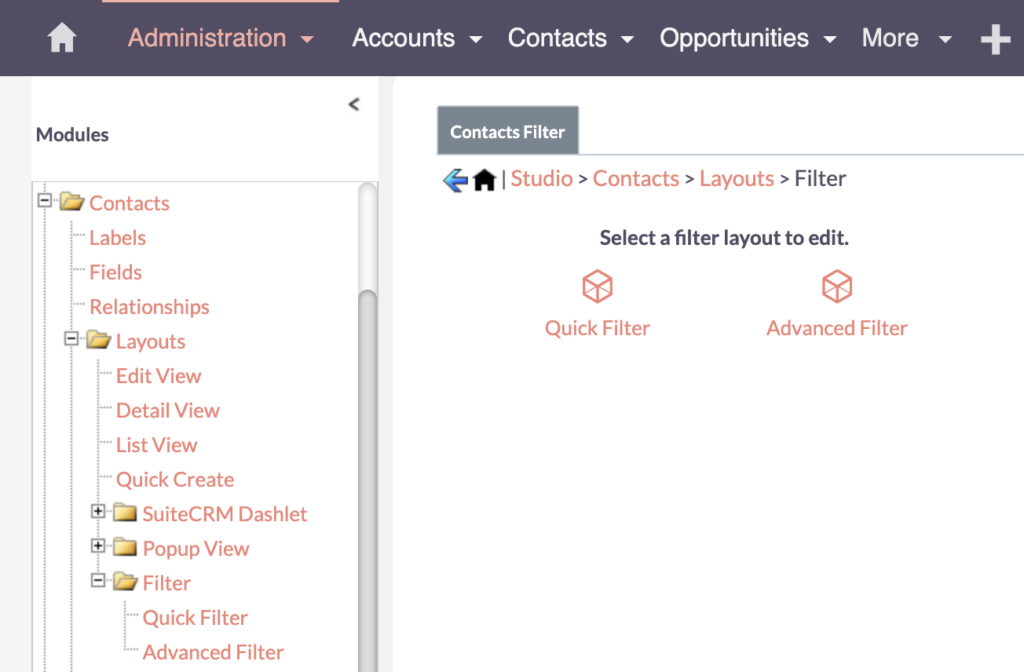
Let’s begin by opening the Admin panel in a new tab. Go to the Studio (under Developer Tools) and look at the modules listed on the left. Let’s focus on the Contacts module this time.
In Layouts and Subpanels, you can set up filters and special views. You’ll also find the Fields here – check out my other video on how to add and edit fields.
Edit / Detail View
Customizing the Edit / Detail Views in SuiteCRM
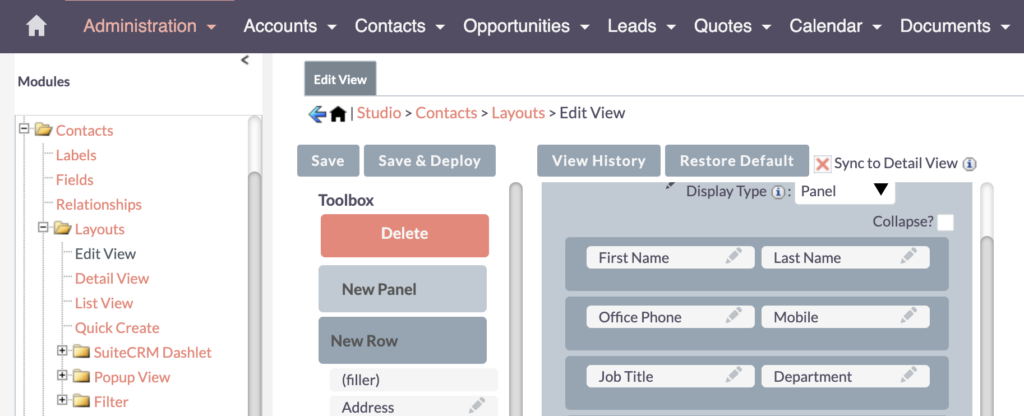
Starting with the Edit View. Let’s walk through the process of enhancing user experience by syncing it with the Detail view. This ensures a seamless transition for users entering or editing data.
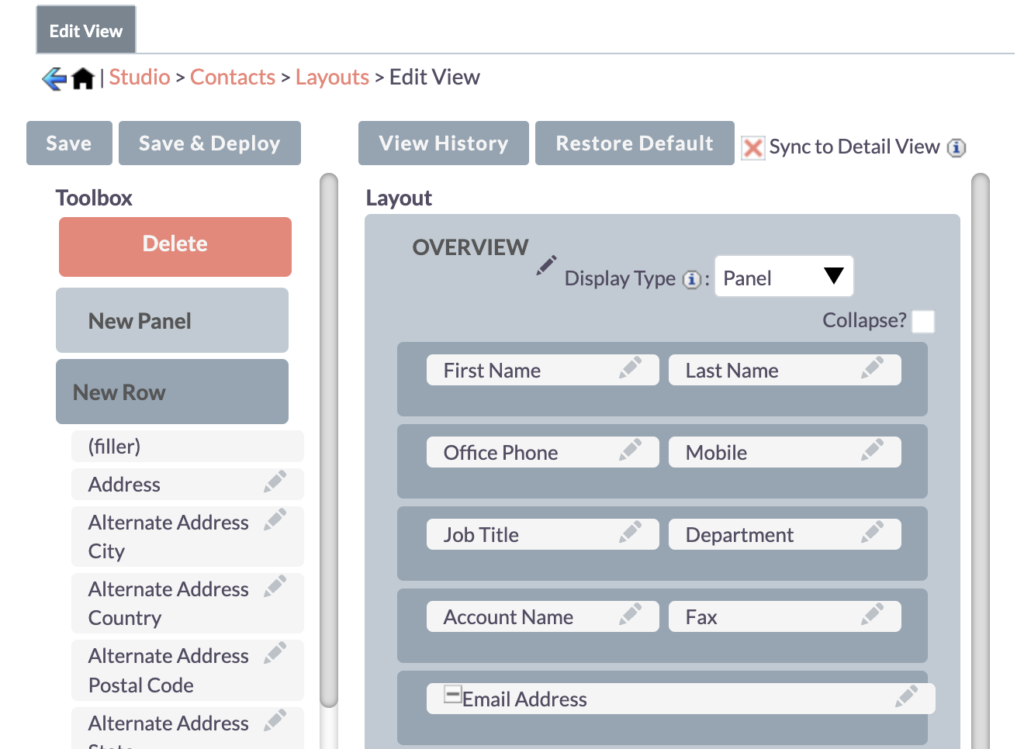

Now, let’s check if the field order in the Edit View (back end) and the front end is the same. As you can see in this example, the Office Phone and Job Title in the front end can also be seen from the back end, and the other fields follow the same order.
Sync to the Detail View
When using the Edit view, you can see the Sync to the Detail View option. Enabling this feature ensures consistent field order, providing a seamless experience for users entering or editing data. I usually switch this feature on in my projects.
Remember to save and deploy to automatically synchronize any changes made to the Detail View.
Create/Remove a Field from Detail View
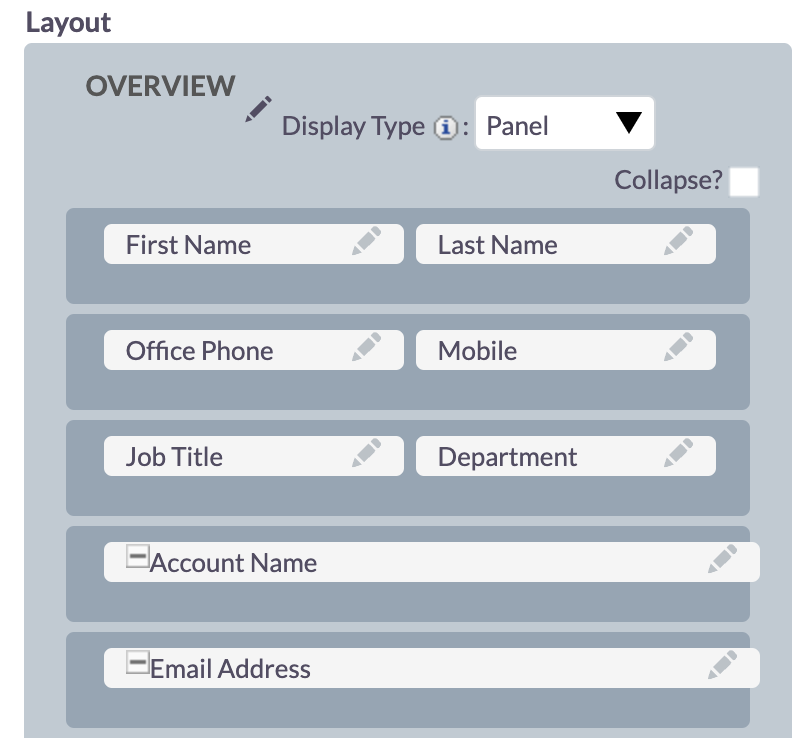
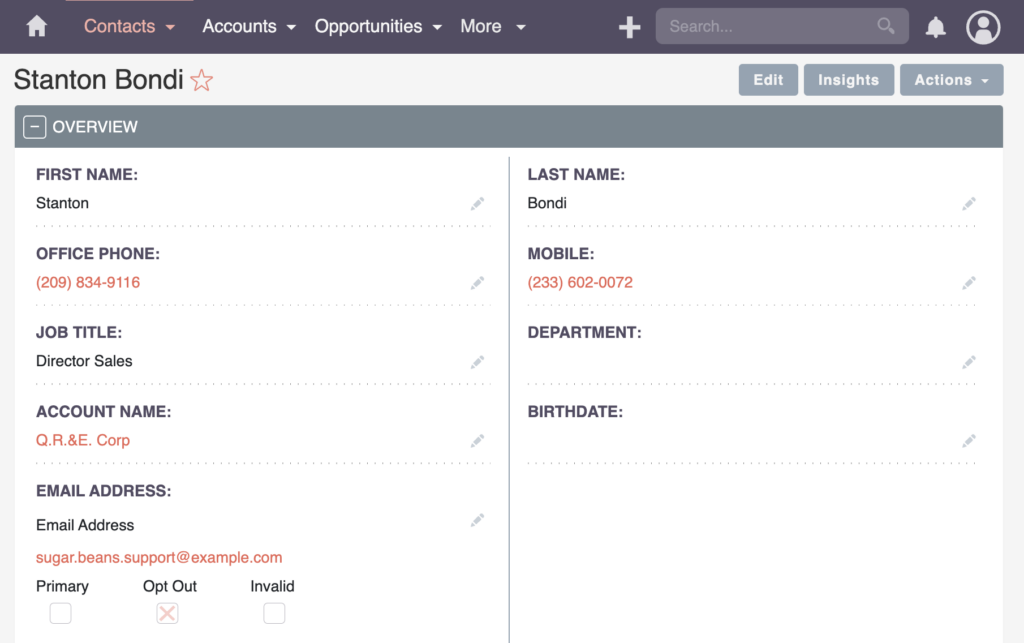
In this example, you’ll see the Fax field. Is it a field you actually use? I don’t often use it in my projects. If you find it unnecessary, you can easily drag and drop the Fax field into Delete to get rid of it. This way, you can remove less important fields.
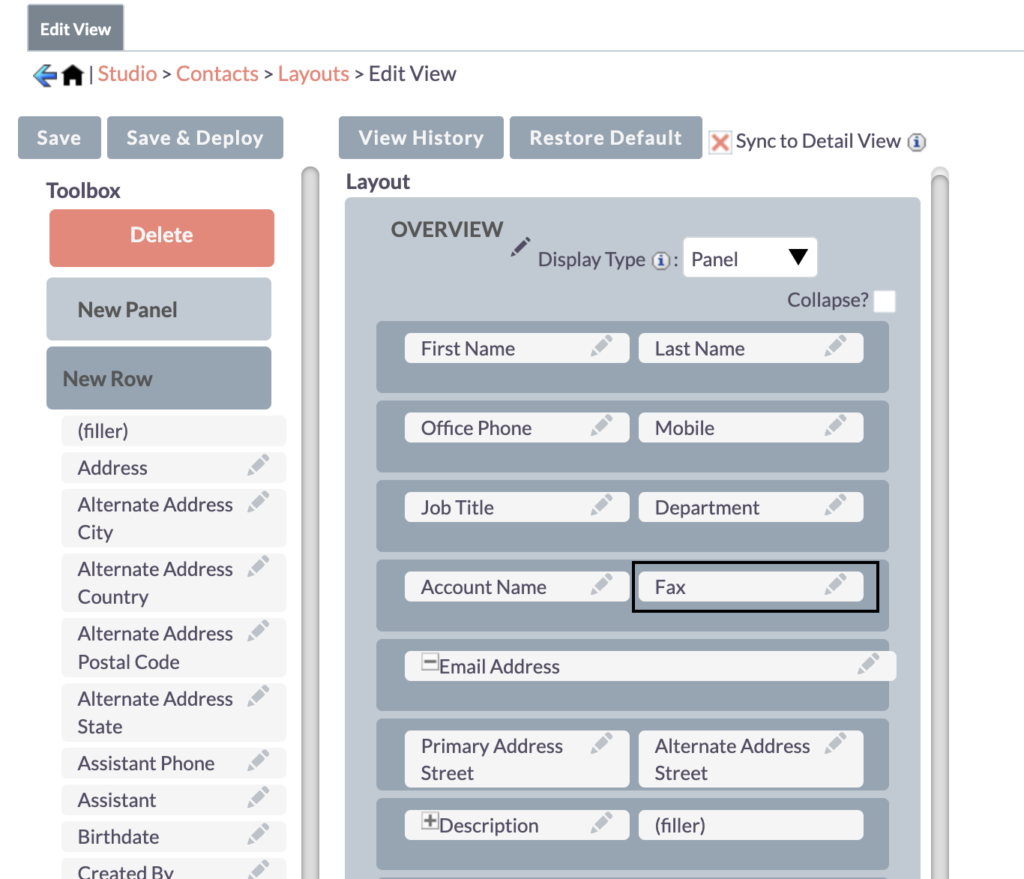
Although SuiteCRM typically has a two-column layout, further customization may be required. For example, after removing the Fax, the Account Name now occupies the entire column.
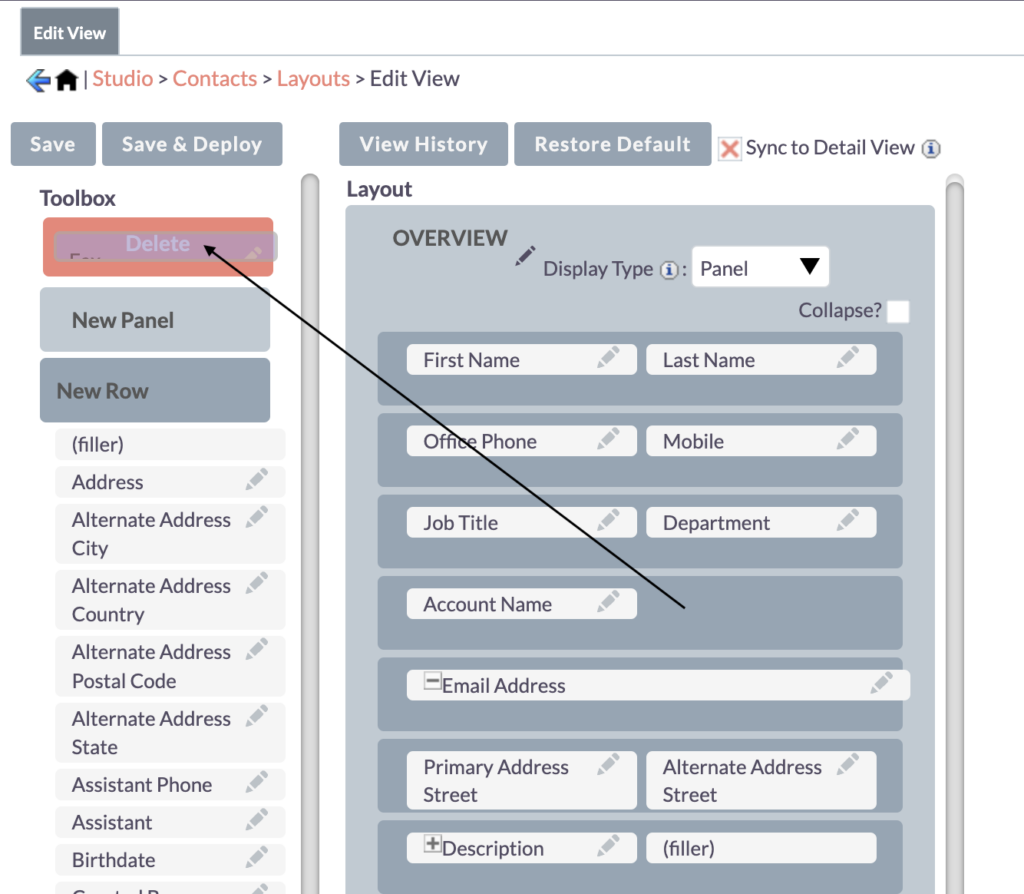
To address this, we can enhance the layout by adding essential fields, such as the Birth Date. Simply drag & drop the Birthdate field to the previous position of the Fax field, then proceed to save and deploy.
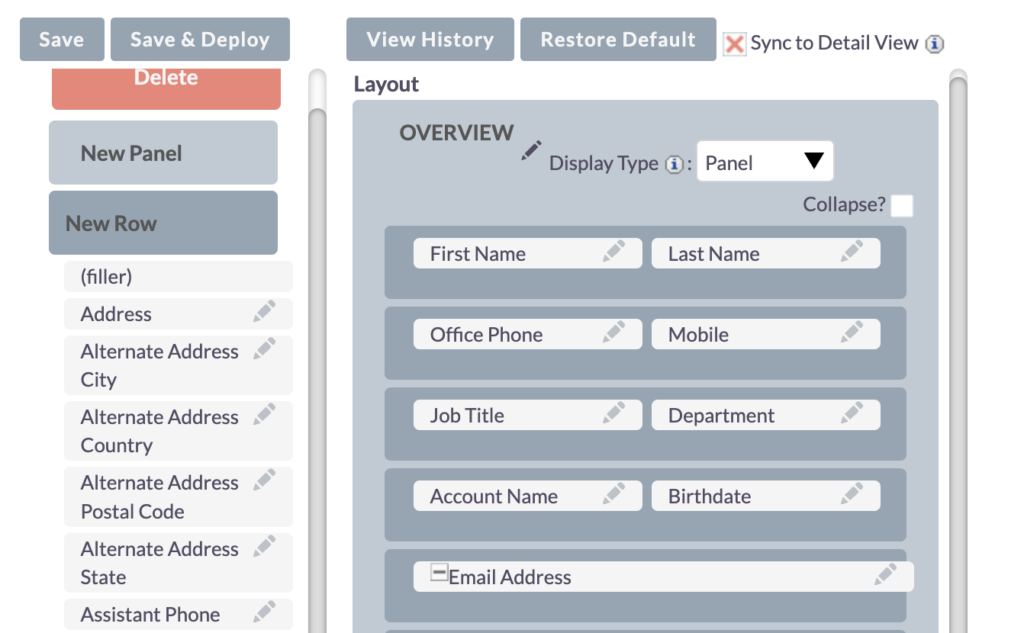
To check, refresh the front-end page and see if the changes show up right away. You should now see the Birthdate instead of the Fax.
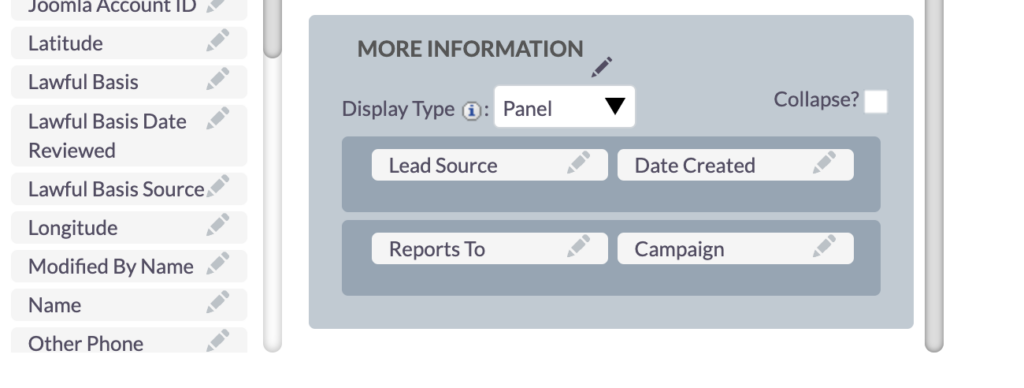
Some details don’t exist in Create (Date Created)
Sometimes, it’s good to know when something was first created. This helps us understand its history, like when it was created and what happened afterward. I often like to display Date Created in my projects. It doesn’t have to be in the most popular panel; it can be displayed in a lower panel or a different tab. I just move the Date Created field to the bottom panel, then save and deploy.
After refreshing the page, you’ll now see the Date Created.
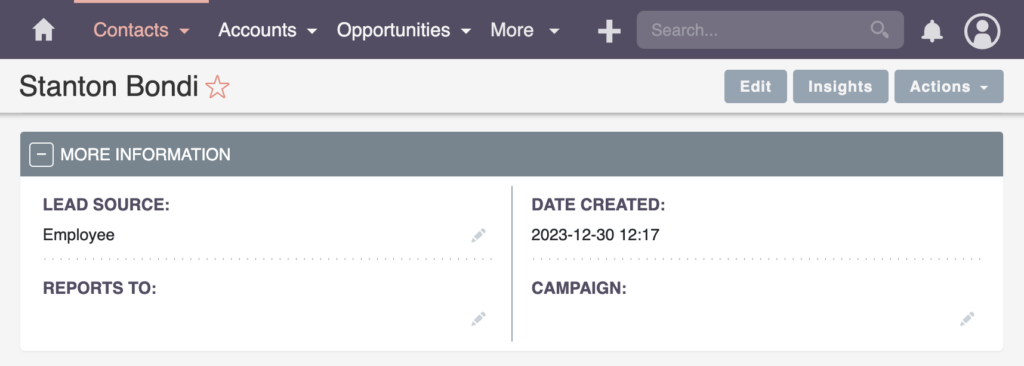
It’s interesting because it only shows this information when it already exists for the record. For example, if you’re creating a new contact, you won’t see the field initially. But as the system creates the record, it automatically adds the right date and timestamp. So, you don’t have to worry about entering it manually or trying to fake it. Using this field reveals differences, even if you decide to sync it with the Detail View.
Utilizing the New Panel and Tab options
In previous discussions, I’ve mentioned meta information and special panels before, like “date created”.
New Panel
Another aspect to consider is incorporating a New Panel. You can drag and drop the new panel at the bottom of the layout. You can use this panel as metadata or key performance indicator (KPI) data. It is possible to use it and fill it with information from various sources, such as workflows.
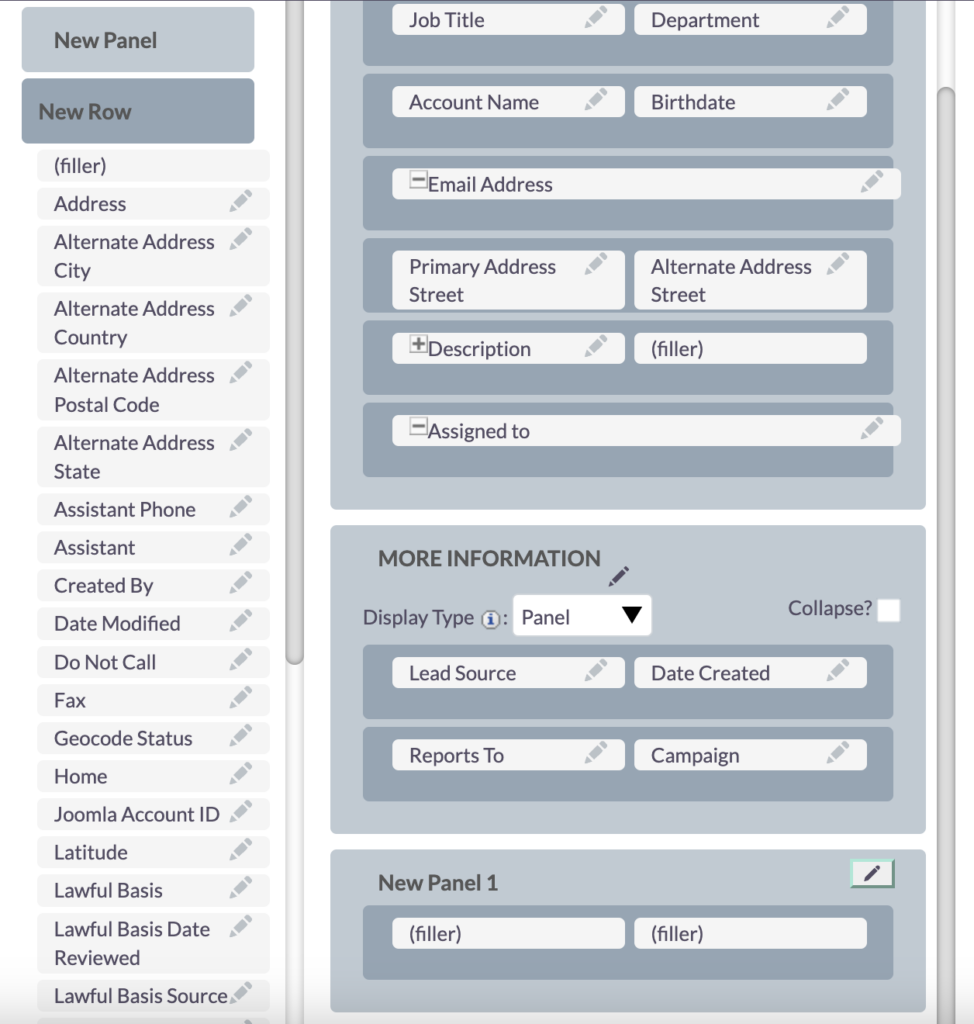
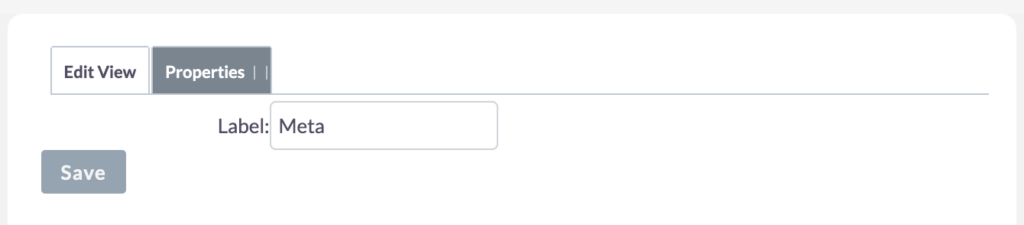
After making these adjustments, save and deploy the changes.
Tab
You can also place this New Panel in a different tab by choosing Tab as the Display Type. This is helpful, especially in several of my projects where the main view is important for quick access to data by the sales and marketing teams. They want to see the most important data right at the top.

So, when you’re adjusting the layouts, fields, and views, make sure to focus on what’s important for them immediately.
Additionally, you may have some important data like KPIs and events to track. These can be conveniently placed in a separate tab.
Reload the front end and you’ll see what I’m talking about.
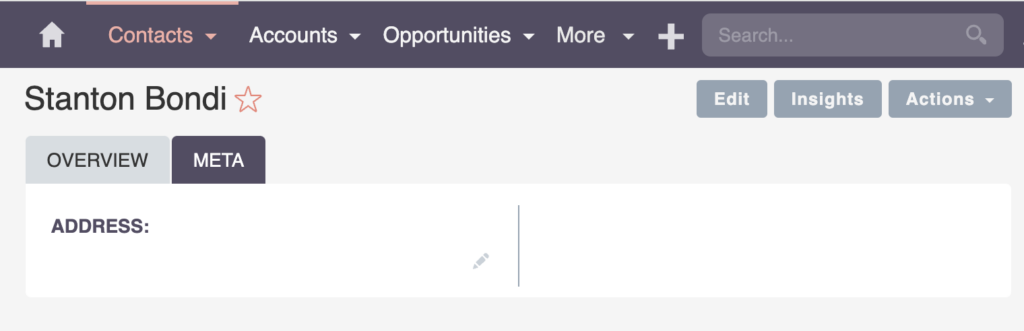
This ensures consistency, allowing the sales team to stay here. However, if you’re involved in generating reports, particularly for data analysts or business analysts, go to the Meta tab. Here, you’ll find key details like addresses, checkboxes, and the timeline of events – such as the transition from a marketing qualified lead to a sales qualified lead.
In your work process, there are many points where things change. You might want to keep an eye on these changes, and this is the perfect chance to organize and keep track without it being too noticeable or intrusive.
To sum up, mastering the Edit and Detail Views in SuiteCRM enables you to customize the CRM system to suit specific business requirements.
Next up, we’ll explore optimizing List Views within SuiteCRM.
List View
A Deep Dive into SuiteCRM’s List View Configuration
List Views play a crucial role, especially if you work on this frequently. It’s similar to an Excel sheet, organizing data into rows and columns.
Let’s start by going through the Columns.
Displayed columns are visible, and then there are the Hidden ones.
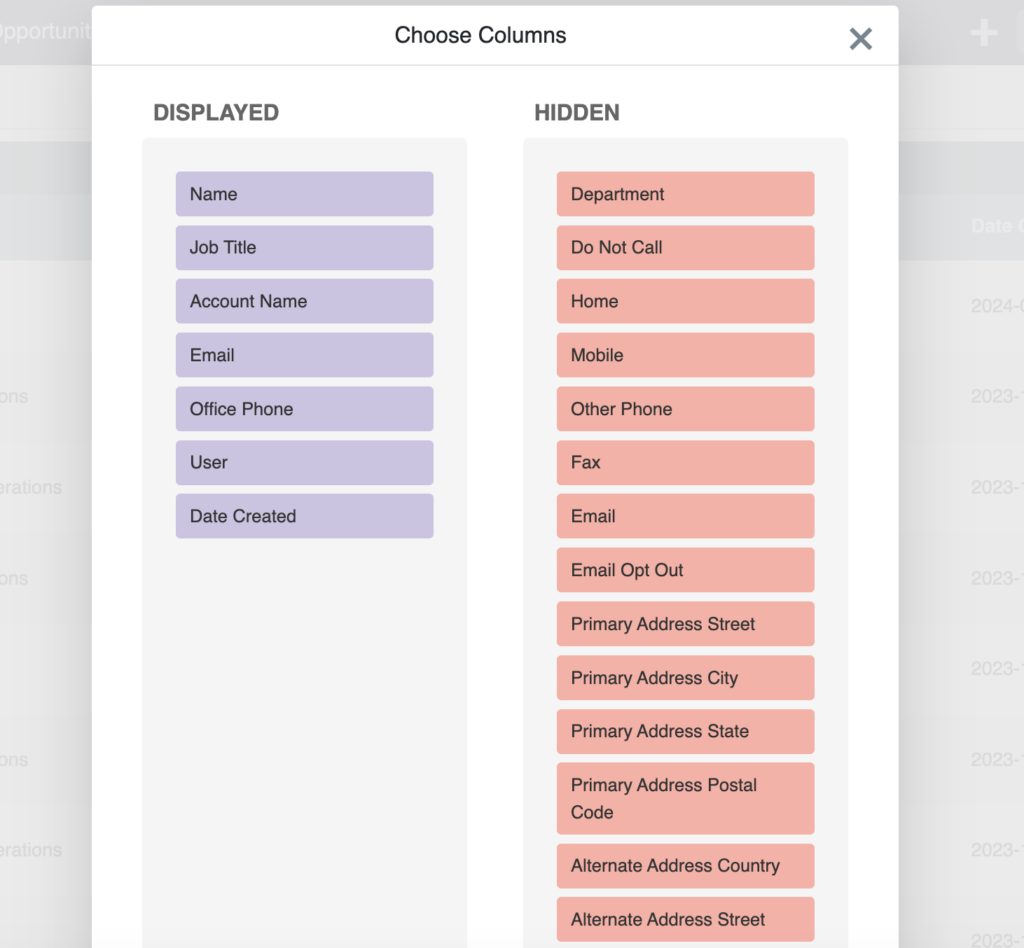
If you have two different teams or groups of individuals collaborating on the same module — for example, in the context of customer service, after-sales, and sales preparation — each group may have unique preferences for the columns they wish to view. Here, you can drag and drop columns based on your team’s specific needs.
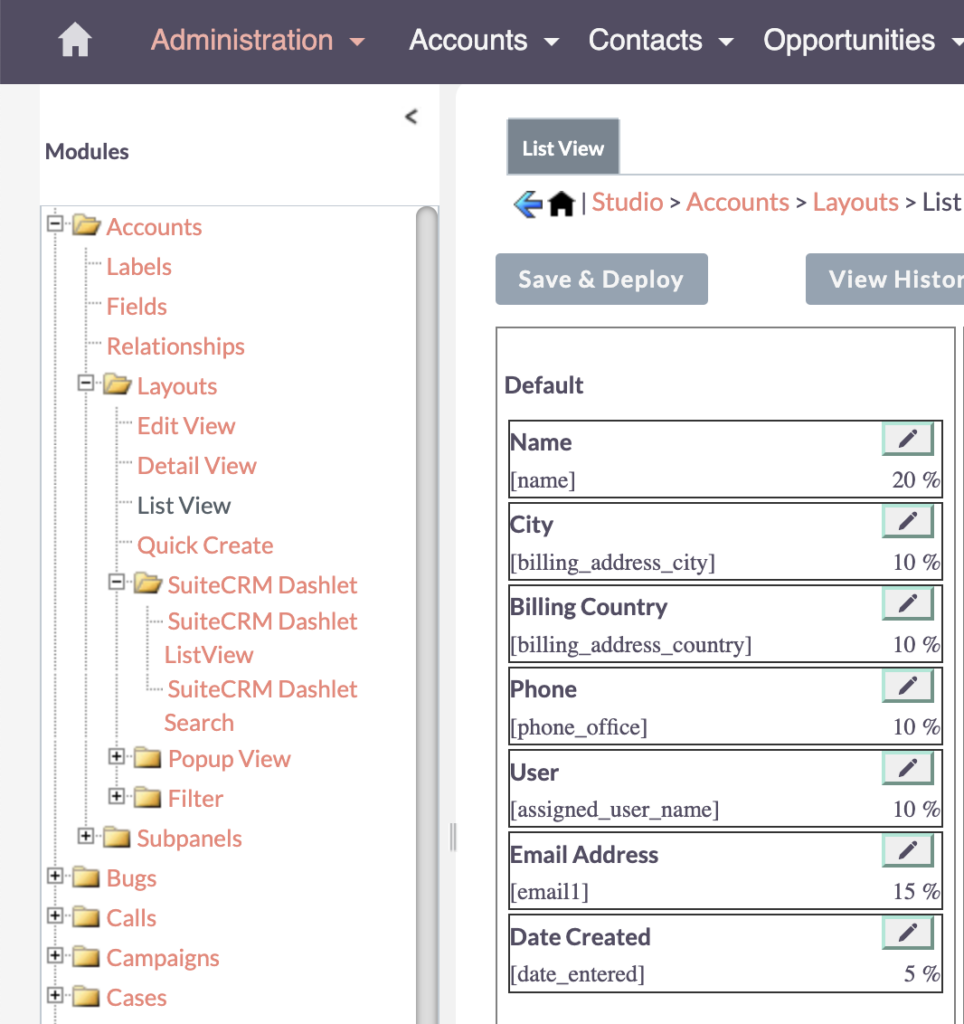
How to Configure the List View
To configure this, navigate from the Edit View to the List View. In the list view, you will find three columns.
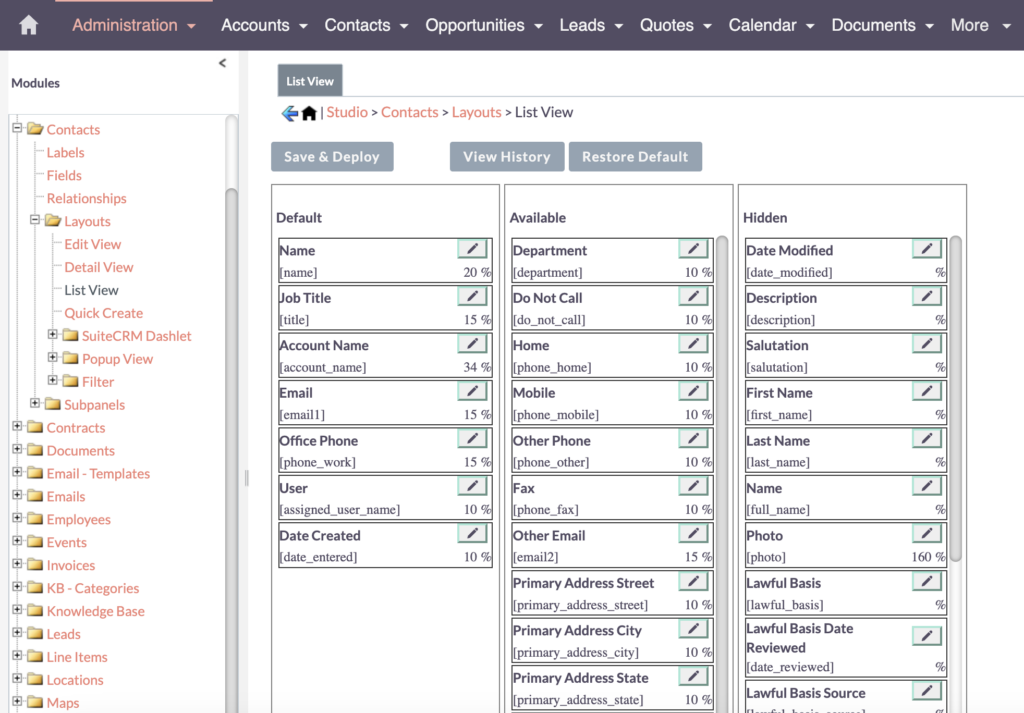
- Default – displays the fields exactly as they appear.
- Available – allows users to make adjustments according to their preferences.
- Hidden – contains fields that are not visible on the display.
For instance, Date Modified could be important to ensure data freshness, and you can easily customize the view to prioritize this information.
In one project, we implemented a work policy that focused on maintaining up-to-date data. Specifically, the team was working on Leads and Opportunities, and ensuring the freshness of the data was crucial. While the Date Created might not hold as much significance, we made it available. However, the Date Modified was prioritized, and we wanted it to be visible immediately.
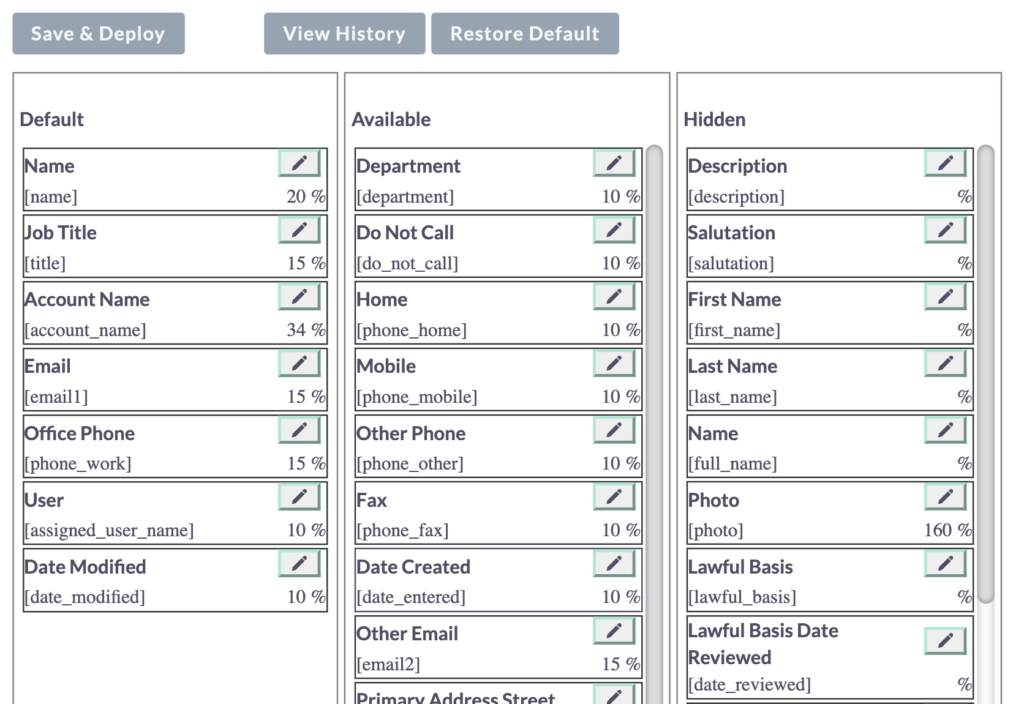
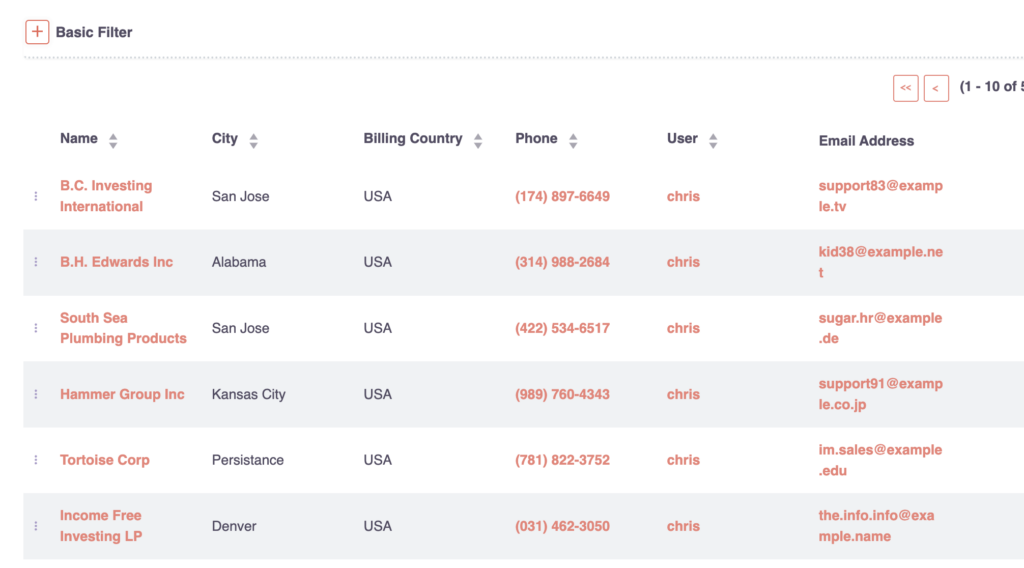
After you save and deploy the changes, navigate to the Contacts page to see the changes.
Initially, the Date Created appears as the last column. To see the latest modifications, simply refresh the page. The Date Modified column will now appear as the last column. This feature can be incredibly useful for assessing the freshness of the data.

A best practice is to use this approach by providing users the desired opportunities and options through columns that meet their specific needs, without exceeding what is necessary or required.
Filter View
Crafting the Perfect Filter Views in SuiteCRM
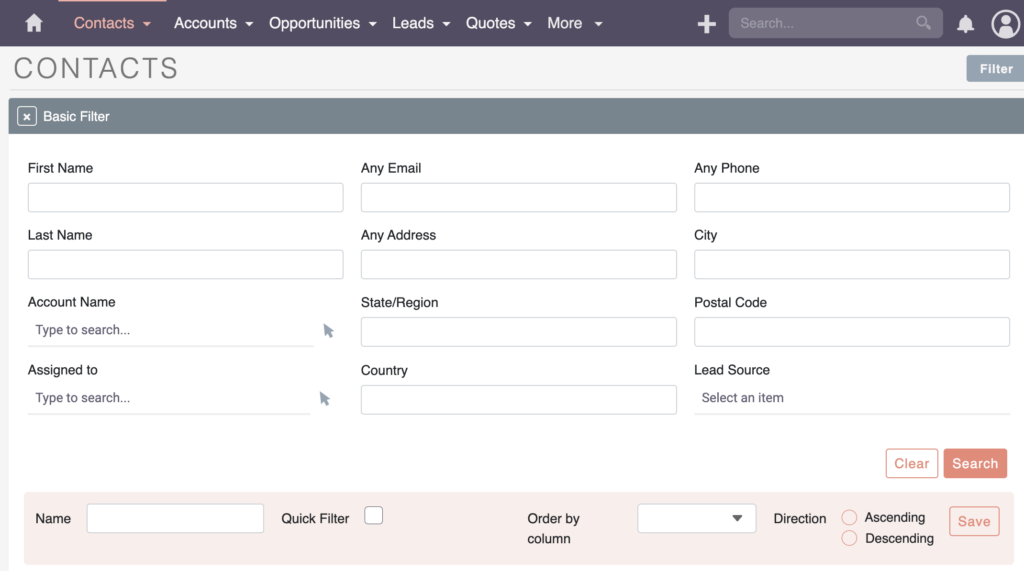
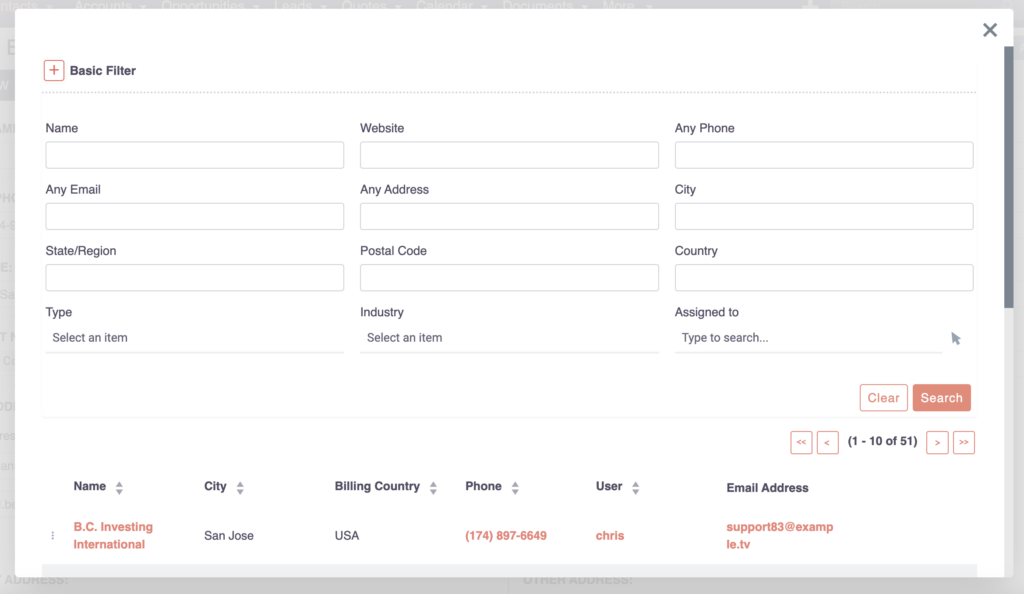
When working with customizing SuiteCRM views, there is a special feature called Filter, which you can use if you wish to search for specific groups or segment them for future reference.
If you’re interested in learning more about segmentation, I recommend checking out my video on that topic.
SuiteCRM offers convenient features known as Quick Create and Quick Filter. Although these features only existed in SuiteCRM version 7, they are still available for historical reasons. However, now we primarily use the Advanced Filter.
In the Advanced Filter, you’ll notice that the fields available here are the same as those you see on the front end. For example, you’ll find fields like first name, email, phone, and so on.
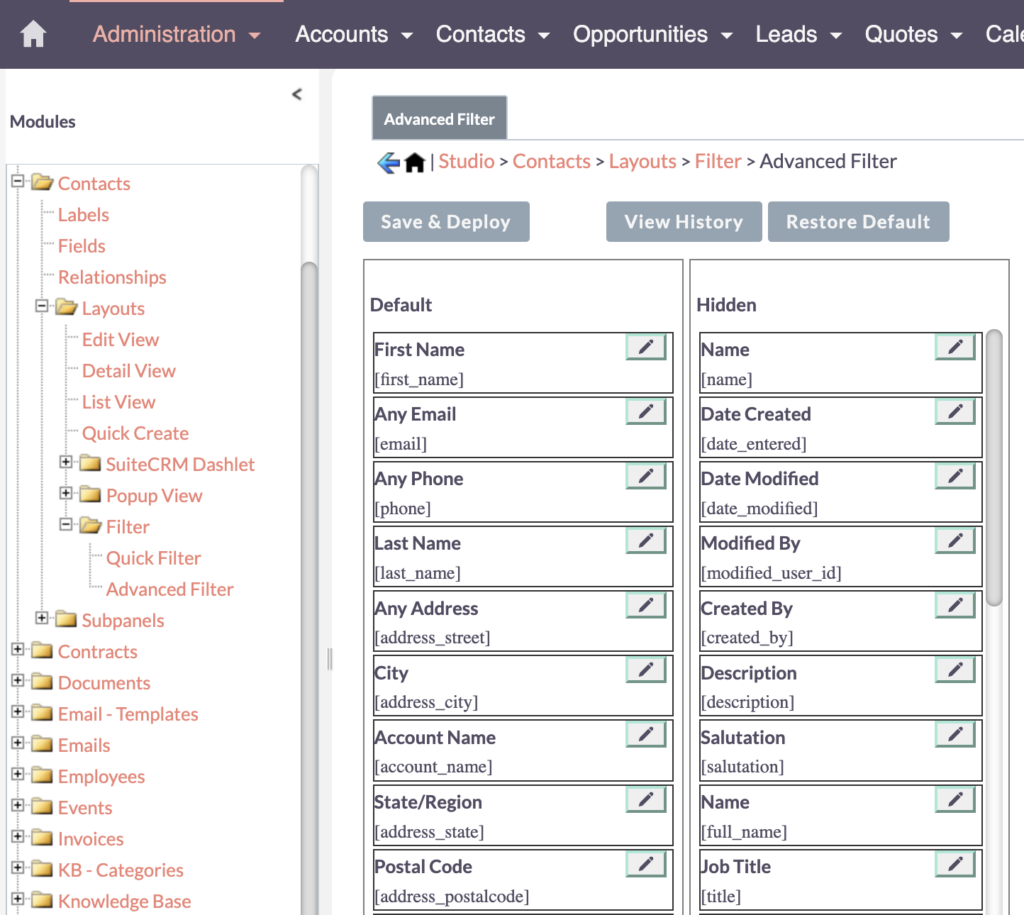
You can adjust and customize these fields according to your specific needs. If certain fields are not relevant to your workflow or if you require additional fields, simply drag and drop them. Once you’ve made the desired changes, save and deploy the configuration.
By customizing the filter fields, you can ensure that the filtering process aligns precisely with your requirements. This level of flexibility makes working with SuiteCRM much easier and enables you to efficiently manage and analyze your data.
By customizing and using filter views, you can enhance your workflow and make it more efficient. The ability to tailor the filters to your needs allows you to work with relevant data more easily. It simplifies the process and enables you to focus on what matters most for your tasks and objectives.
Subpanel List View
Enhancing Subpanel List Views in SuiteCRM
Moving on to Subpanels, we explore how to customize the list views within these related modules.
When you go to the Contact, you will come across subpanels. These subpanels contain related information that is associated with the contact. By scrolling down, you can select which subpanels you want to view. For example, you might have an Opportunity subpanel that displays data related to opportunities.
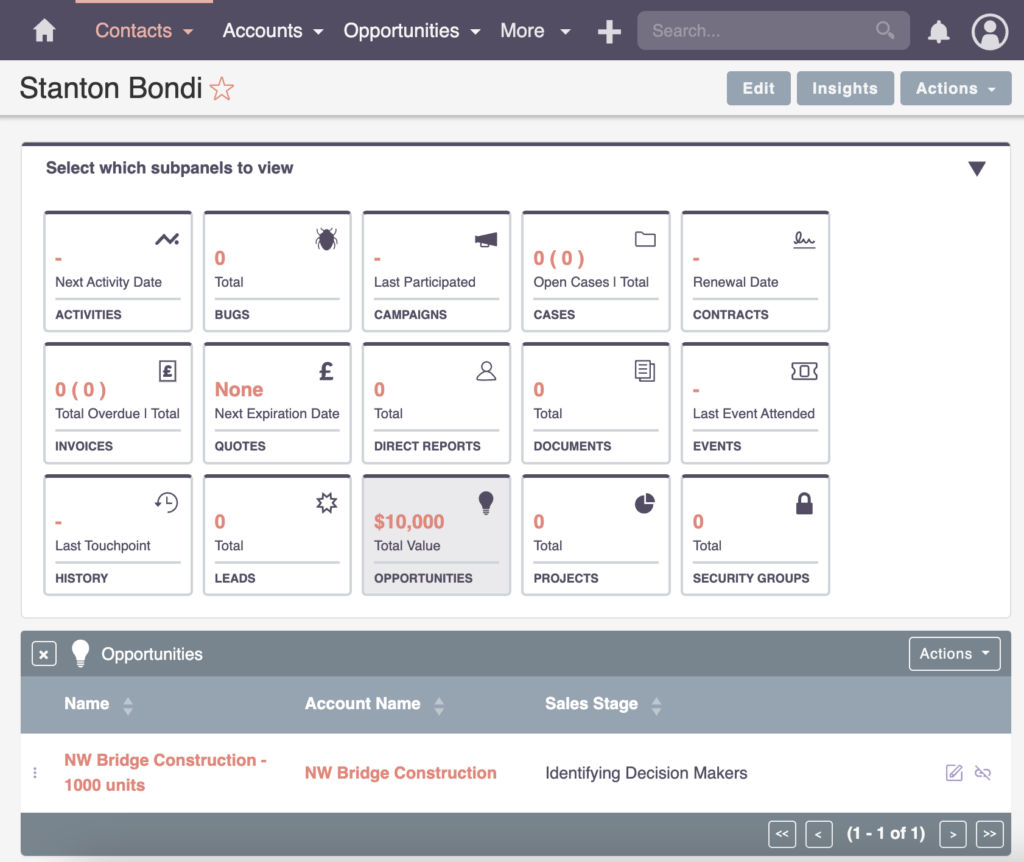
Inside the Opportunity subpanel, you will find a list view that resembles the familiar layout. It presents information such as the name, account name, sales stage, and close date. The great news is that you can adjust these list views to meet your specific needs.
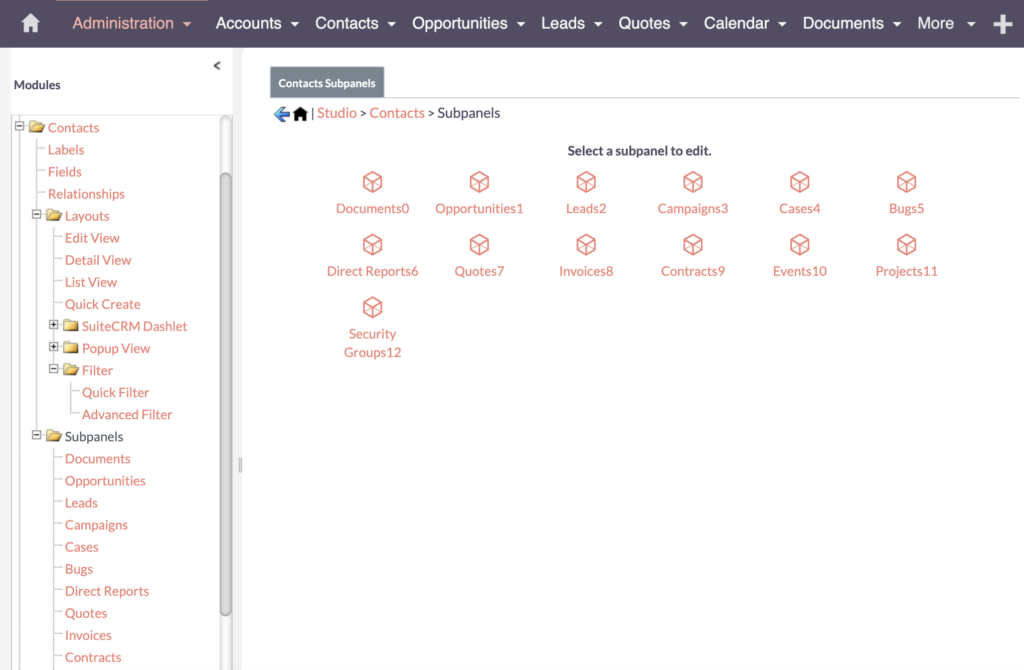
To customize the Subpanel list views, you can access the related module settings. Simply go to the Subpanels from the Studio, locate the specific related module (in this case, Opportunities), and click on it. This action will display the list view configuration for the subpanel.
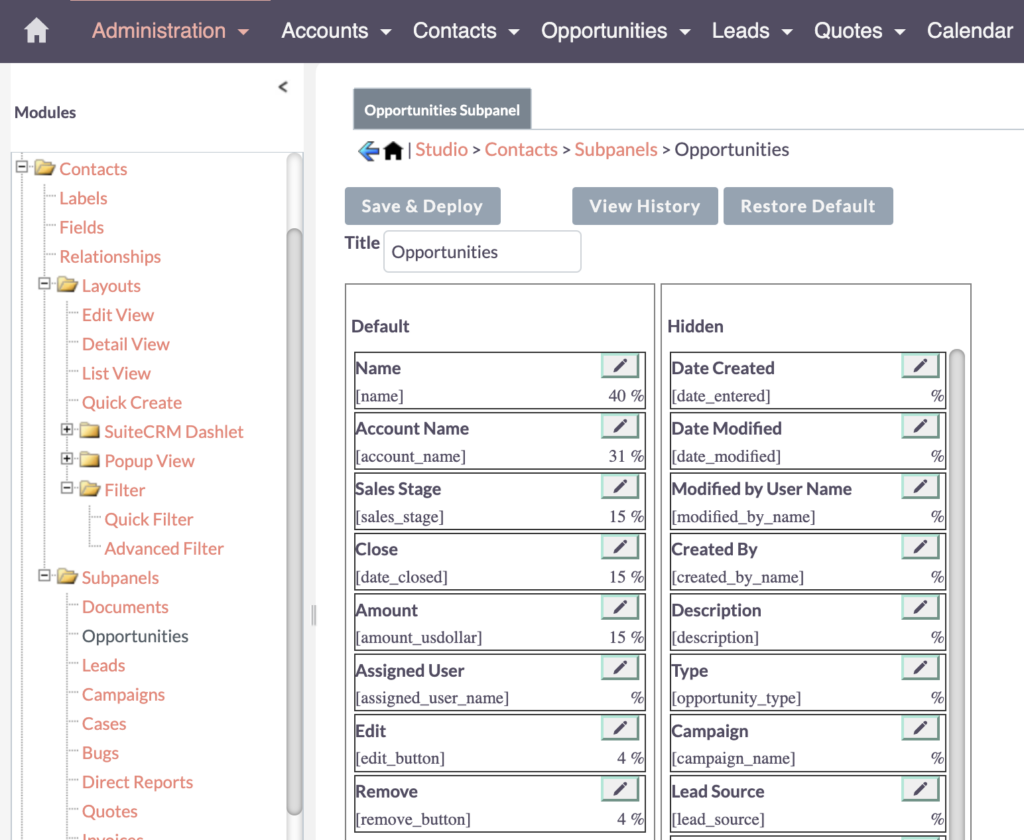
Here, you can freely configure the columns that appear within the subpanel. You have the option to include or exclude fields such as Name, Account Name, Sales Stage, and Close Date. By tailoring the list view to your requirements, you can optimize the display of information within the subpanel, allowing for easier access and better organization of related data.
Dashlet View
Exploring SuiteCRM Dashlet Views
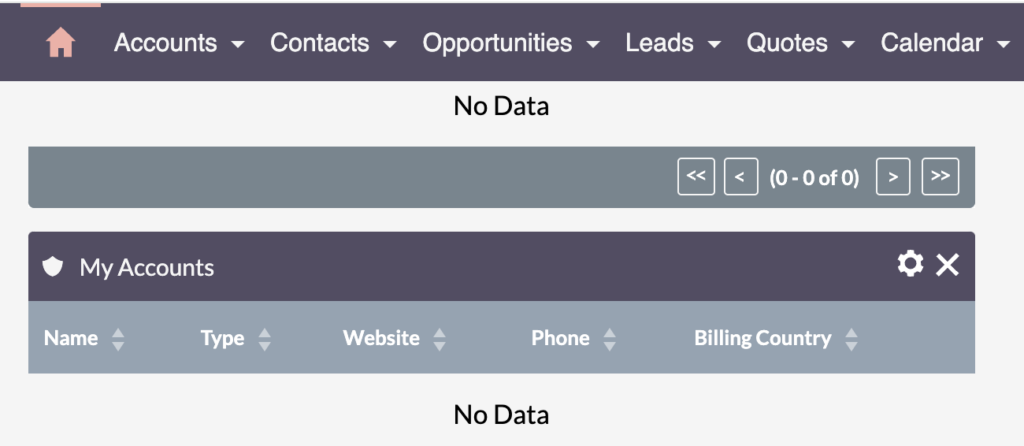
SuiteCRM Dashlets offer a way to configure your homepage for quick access to urgent and important information. You can configure it based on individual users, teams, or groups. Let’s explore how to adjust the list view within Dashlets, ensuring you see what matters most upon login.
To achieve this customization, there’s a feature called SuiteCRM Dashlet.
Access it by navigating to:
Accounts > Layouts > SuiteCRM Dashlet > SuiteCRM Dashlet ListView
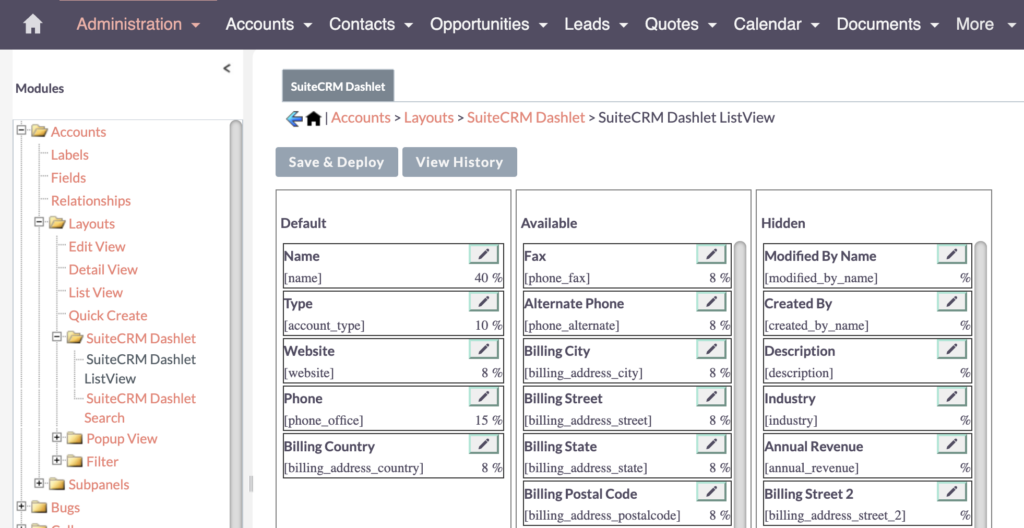
Inside the Dashlet, you have the option to create a list view that presents relevant data. You can quickly modify the Account layout to include the desired fields. For example, the default list view in the Dashlet includes fields like Name, Type, Website, Phone, and Billing Country.
Dashlets are powerful and convenient, but it may sometimes be challenging to locate where specific elements are located within SuiteCRM. However, with a little exploration and guidance, you can easily navigate SuiteCRM and leverage its customization options to create a personalized and efficient homepage that meets your needs.
Search: Filter & List View
Search: Filter & List Views – Navigating Data in SuiteCRM
When it comes to configuring views and making adjustments in SuiteCRM, there are a few more options worth exploring.
Let’s go back to the Contacts module to take a look.
Here, you’ll find another list view that you can either configure or may have already configured. Within a contact, when you search for an Account, you’ll notice a basic Filter that resembles the list view we previously encountered. It includes fields such as Name, Website, and Phone.
Before, these views were split up and separated, which could make the configuration a bit complicated. However, it’s often important to maintain consistency with the views you’re already used to.
For example, if the standard list view for Accounts aligns well with your business needs, there may be no need to switch to a different view within the Contact module. It’s important to avoid confusing users.
As we navigate inside the Accounts module, you’ll find the default List View with fields like Name, City, Billing Country, and Phone. This view matches the one we saw earlier.
However, it’s important to note that when you’re inside the Contact module and loading the Account view, it’s displaying the list view that corresponds to the related account. This is due to the relational nature of the data.
Recap
Brief Summary of SuiteCRM Customize Views
Let’s quickly recap what we’ve learned so far.
Firstly, we explored the Edit View and discovered how to customize fields based on your specific requirements. We also observed the transition from the Edit View to the Detail View, along with the standard List View. Within the List View, we delved into the functionality of Filters.
Furthermore, SuiteCRM offers additional views that can be tailored to your needs. These include Filters, Dashlets, Subpanels, and related List Views from other modules. By configuring these views, you have the flexibility to display and organize CRM data according to your needs and business processes.
If you’re interested in understanding more about fields, be sure to check out my video on that topic.

With SuiteCRM Views, you’re in control!
More than a window, it’s your curated view into business excellence. Customize, refine, and enhance your CRM journey.
Bastian Hammer