SuiteCRM Workflow Basics: Your 4-Step Guide to Boosting Efficiency and Streamlining Processes
Revolutionize your business flow effortlessly! Let’s explore the SuiteCRM Workflow Basics in this 4-step guide.
Hey there! Are you ready to automate your business processes? Let’s get started with SuiteCRM Workflow Basics!
First things first, let’s assume your SuiteCRM system is up and running, and your team is actively entering data. The challenge now is to get the necessary information for reports and ongoing processes. Why not automate certain aspects of your workflow to make things easier?
Here’s a simple 4-step approach to help you do just that.
- Step 1: Define the Process
- Step 2: Check the Data
- Step 3: Build the Workflow
- Step 4: Test and Deploy
Discover the ins and outs of SuiteCRM Workflow Basics in this enlightening video.
We will discuss in detail each step later in this blog, So let’s start with defining the process.
Step 1: Define the Process
Define Processes in SuiteCRM Workflow
The first step is to define the workflow process, ensuring a timely response to potential opportunities, particularly those generated from leads on your website.
Imagine you have a web form on your site. Visitors fill it out, input their details, and once they click “Send,” the data transfers to your CRM system, generating new leads. The business process evolves, and it’s crucial to take prompt action.
Now, imagine a scenario where leads come in via a lead form on your website. The objective is to trigger a workflow when the budget associated with a lead exceeds $10,000, leading to the immediate creation of a call. This ensures a swift response to high-value opportunities.
Step 2: Check the Data
Check Data for Efficiency
Now, let’s move on to the second step: Checking the Data.
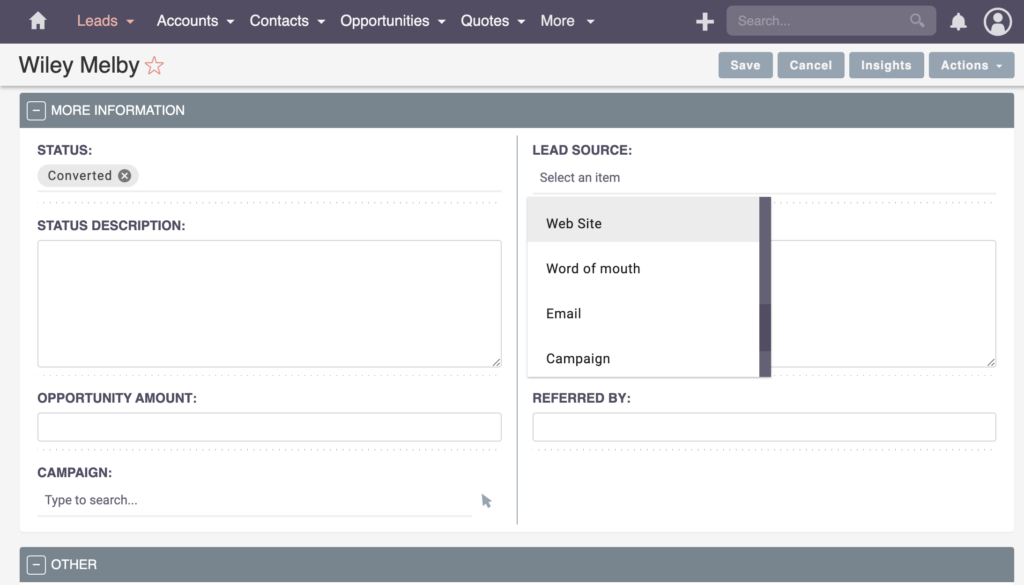
For new processes, checking data is optional. However, in an existing setup, ensuring data accuracy is crucial. Suppose there’s a requirement, like the Lead Source, always needing to be the website. If this information is not consistently filled, your workflow might not trigger correctly.
To check, navigate to the Lead Source, edit it, and ensure options like “website” are available. Then confirm both the existence of the data value in the CRM system and its proper filling. If not filled, consider implementing a new workflow for future processes, ensuring accurate data input. This step is essential for the effectiveness of your automation in the long run.
By double-checking the data, you’ll ensure that your workflow triggers correctly and that your automation is effective. This step is crucial for the success of your SuiteCRM workflow.
Step 3: Build the Workflow
A Guide to Build the Workflow in SuiteCRM
Let’s proceed with the third step – Building the Workflow.
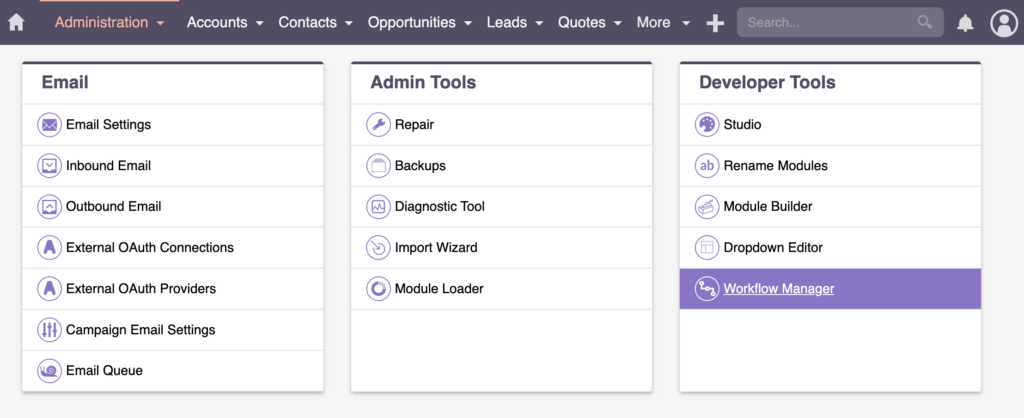
To initiate this, head over to the Admin Panel and access the Workflow Manager.
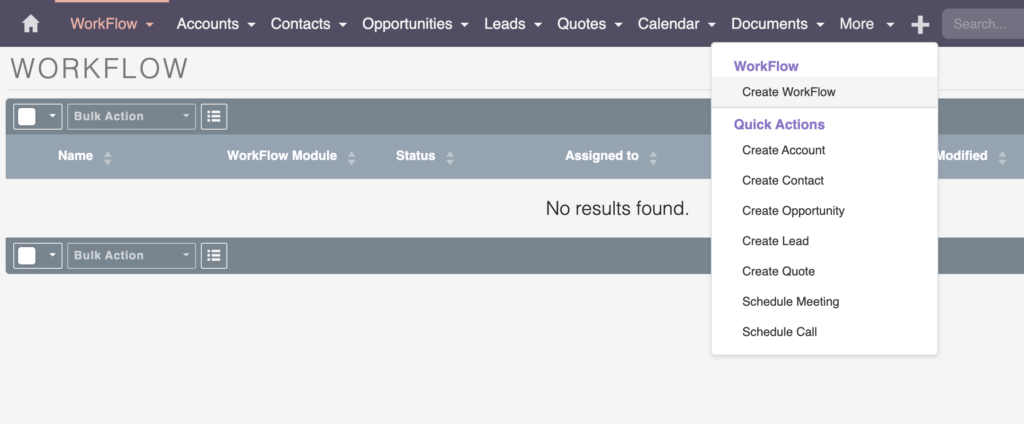
In a newly installed SuiteCRM system with demo data, you won’t find any predefined workflows. So, let’s create a new one!

SuiteCRM Workflow Basics
Let’s start by inputting the essential header information. This is a crucial step in setting up your SuiteCRM workflow, as it will help you define the process and ensure that everything runs smoothly.
Here’s what you need to do:
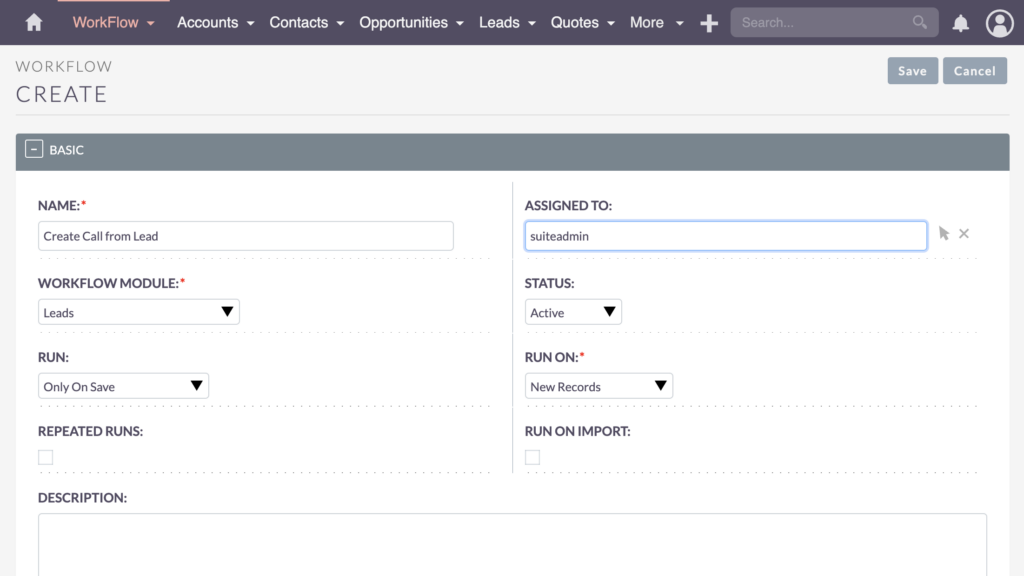
- Name – choose a reasonable name, such as “Create Call from Lead”
- Assigned to – consider assigning it to a specific role or person, especially if you’re working on your SuiteCRM system with multiple admins. It’s helpful for communication and keeping track of who did what.
- Workflow Module – set this to “Leads,” as our goal is to create a call from leads.
- Status – make sure the workflow’s status is Active, so it’s ready for execution.
- Run – now, let’s talk about when we want to run this workflow. We have 3 options:
- Always – this will run the workflow every time the conditions are met, regardless of whether the record is new or existing.
- Only on Save – Since we’re creating a new lead, it’s fine to choose “Only on Save.” This way, the workflow will trigger only when a new lead is created.
- Only in the Scheduler – we can create workflows that run on a schedule, like once or twice a month.
- Run On – we need to specify conditions to narrow down when the workflow should trigger. Select “New Records” to ensure it runs only for new leads.
- Run on import – one more thing to consider is running the workflow on import. If you want to import data and run the workflow, you can enable “Run on Import.” However, if you have larger imports, you might want to deactivate this feature to avoid any issues. But if you have specific data imports from a single supplier, you can use “Run on Import” to have the workflow run on those imports.
- Repeated runs – don’t worry about repeated runs, as we won’t need them for our scenario.
Note:
If we choose to run the workflow on Modified Records, we’ll need to enable repeated runs. But since we’re only working with new records, we don’t need repeated runs for our scenario. It’s all good!
Create Workflow Conditions
Let’s set up some conditions to make sure our workflow triggers exactly when we want it to.

To create a condition, click the Add Condition button.
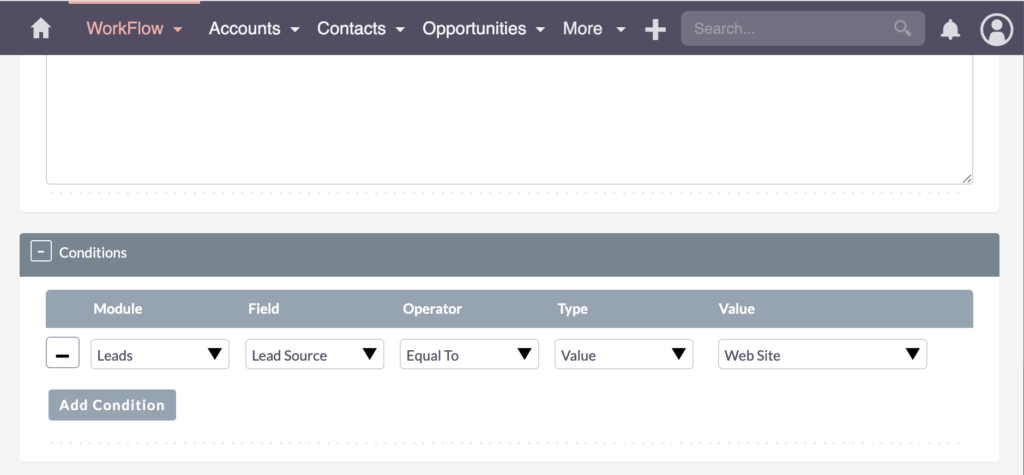
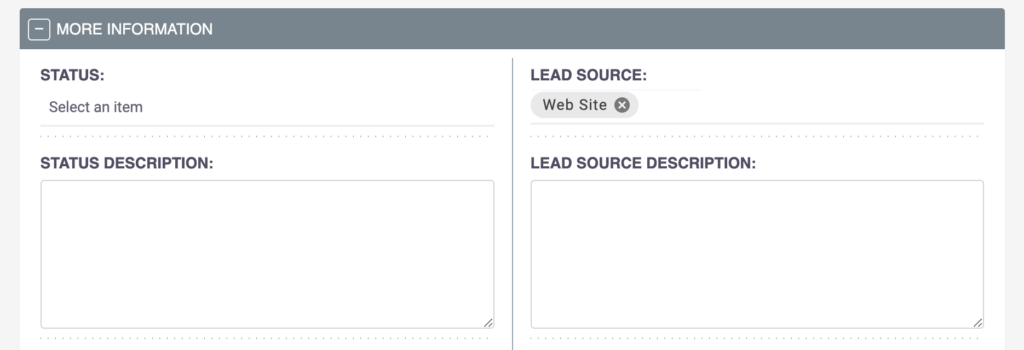
Firstly, we don’t want this workflow to apply to all leads – let’s be specific. We’re narrowing it down by selecting leads with a particular Lead Source, like “website.” Here are the details:
- Module: Leads
- Field: Lead Source
- Operator: Equal To
- Type: Value
- Value: Website
Now, here’s a key point: If the Lead Source is set to “website,” you’ll want to trigger this workflow with caution. Let’s say you have multiple sources for leads, and they all select “lead source equals website.” You’ll need to ensure this workflow fits all of them or if it’s designed for a specific lead source, like “website 1” or “website 2.”
If you want to dive deeper or work with dynamic dropdowns, check out my video on fields and dynamic dropdowns. That way, you can differentiate them more clearly.
Now, with these conditions in place, we’re ready for the next step – Actions, the heart of our workflow.
Create Workflow Actions
Let’s spice up our workflow with some actions!

Click the Add Action button for this step.
Now, in the Select Action field, you have several options:
- Create Record
- Modify Record
- Send Email
- Calculate Fields
The power of this workflow tool becomes apparent because you can perform various actions.
For a simple start, let’s go with:
- Select Action: Create Record
- Name: Call
- Record Type: Calls
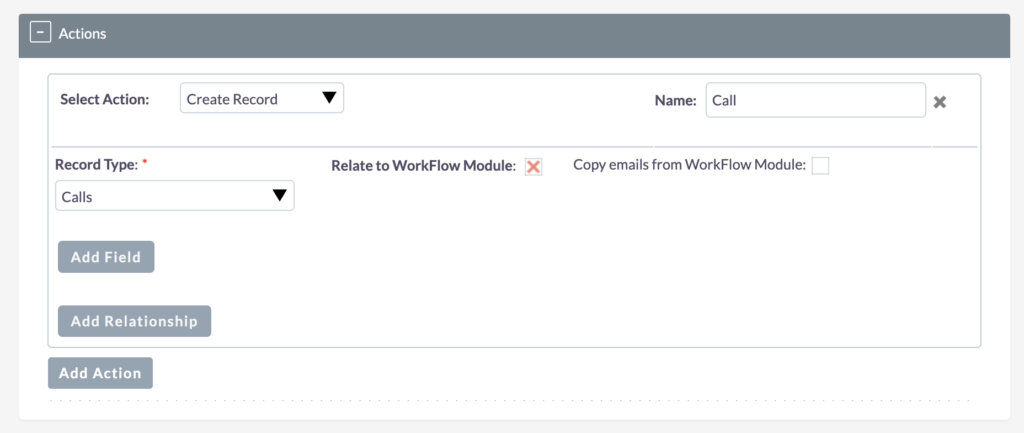
Here’s a great feature: Relate to Workflow Module. If you want your call connected to the lead seamlessly, this feature does it without the fuss of dealing with IDs or related fields. It simplifies the process.
Fields
Let’s add some fields. Click on the Add Field button to get started.
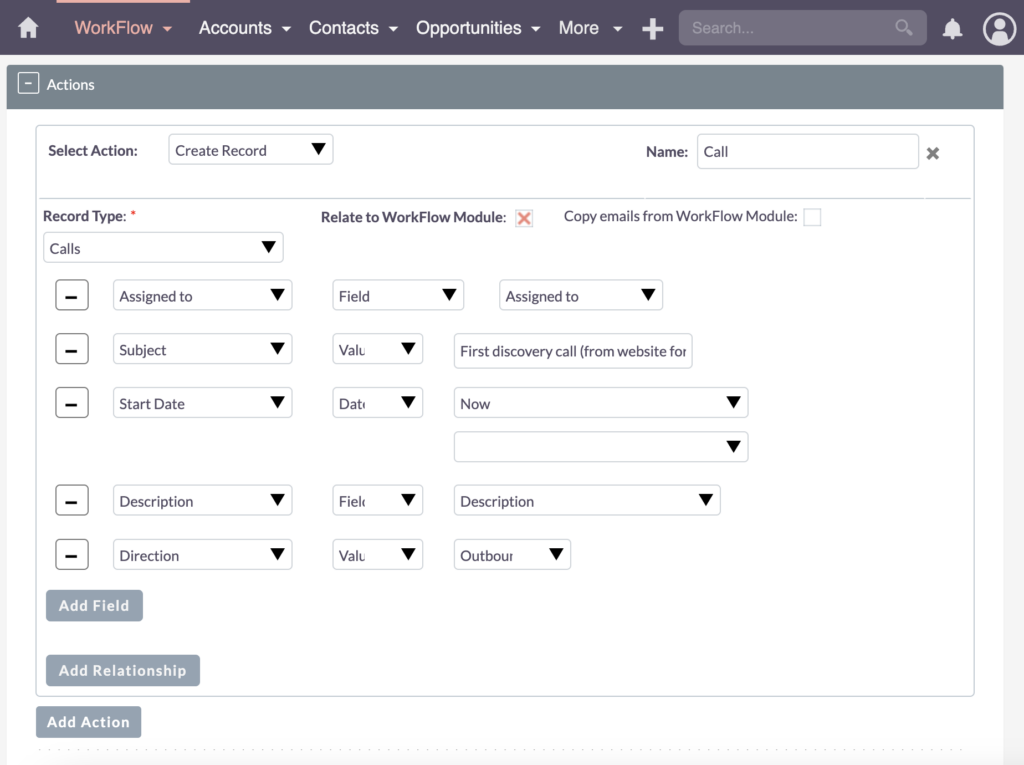
Assigned To
Let’s talk about the “Assigned To” field – a crucial piece to ensure everything runs smoothly. Choose “Assigned To,” then “Field,” and you have options based on your team’s lead distribution. In my case, I want the phone call conducted by the same person who owns the lead, so I select the “Assigned To.” To put it simply, this means “Assigned To” to the lead equals “Assigned To” to the call.
Subject
Now, let’s dive into the “Subject” field – an important touch to give your call its identity. Add another field for the “Subject.” You can write something like “First discovery call (from website form).” This way, everyone in the sales department knows it’s the standard discovery call triggered by the website form.
Start Date
Now, add the “Start Date” field. Since it doesn’t exist in the lead, select “Date” and then choose “Now” for immediate action. The flexibility of this tool allows you to set it to “now,” “today,” “date created,” “date modified,” and even add or subtract minutes. But for now, let’s stick with “Now” for speediness.
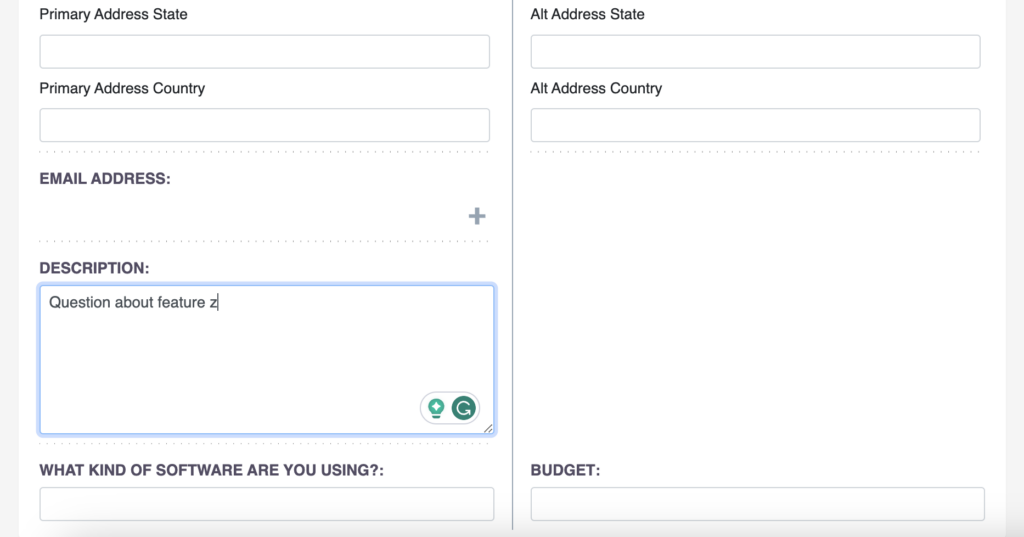
Description
Let’s talk about the “Description” field – a crucial part of keeping things organized. Just select “Description,” then “Value,” and again, “Description.” Depending on your preference, it could be an internal note about the lead or an external message. This makes it easy for salespeople to access relevant information during calls.
In my experience, I’ve worked on projects where we handled this in different ways. We’d sometimes use the Description field as an internal note within the lead. For example, notes like “this lead’s daughter’s birthday is at blah blah blah” – information meant for our internal use. In other cases, we used a separate field, like an external description or a message from the lead. Here, we’d copy and paste or automatically integrate the web form message if they left one into this external field. This way, we could keep things neat and tidy.
So, if I’m the lead and I go to the web form, saying something like “I want to know more about the feature z,” I can integrate those details into the Description field. From the Lead module, I use the Description or External Description field and seamlessly put it into the Call description field. It’s a game-changer for salespeople – when they open the next call, all the lead’s information, including the message, is right there at their fingertips. Easy and efficient!
Direction
Now, let’s talk about the “Direction” field – an essential part of guiding your workflow. Click on “Add Field” and choose “Direction,” then select “Value.” Now, you get to decide whether it’s an inbound or outbound interaction. In our scenario, let’s go with “Outbound” since you’ve received the lead and are gearing up to make that connection.
Double-check your settings, and when everything looks good, hit save.
It’s the moment we’ve been waiting for – time to put your workflow to the test!
Step 4: Test and Deploy
Test and Deploy SuiteCRM Workflows for Success
Welcome to the final step in our SuiteCRM workflow basics – Testing.
To understand how it all comes together, you have two options: either input data into the web form or generate test data here. Let’s create a new Lead for testing purposes.
Click on New or Create Lead, and enter the first name, last name, and, importantly for testing, a description. You can input something like “Question about feature z.”
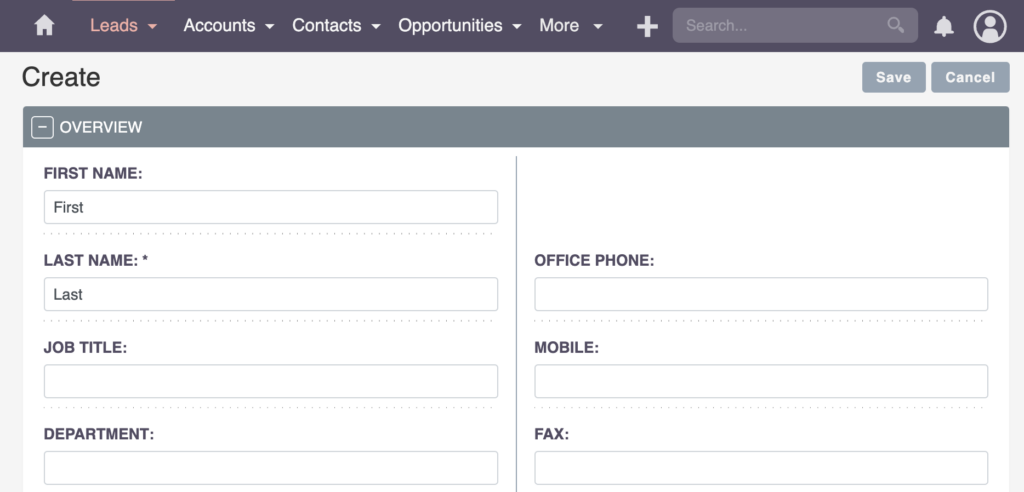
Now remember the Lead Source, it’s the engine that triggers our workflow. Choose “website” and click Save.
Upon saving, nothing visibly changes in the lead section. However, if you head over to Calls, there it is – our first discovery call from the website form. This call is directly linked to the lead we just created, assigned to me for testing purposes.
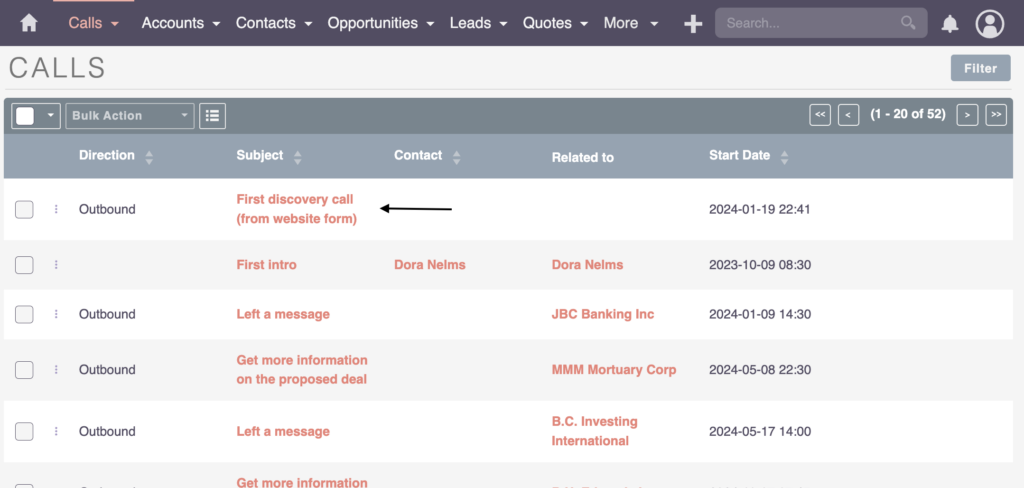
This demonstrates the power of automating data creation and simplifying data entry. Now, with the information entered, a sales team member can easily access the details, like the “question about feature z,” and initiate a call promptly.
So, go ahead, put your SuiteCRM workflows to the test, and witness the efficiency unfold!

SuiteCRM Workflow is your productivity partner!
Identify bottlenecks in your processes and let SuiteCRM Workflows untangle them, paving the way for smoother, more efficient operations.
Bastian Hammer
Recap
Let’s take a moment to recap the 4-step process we’ve explored in SuiteCRM Workflow Basics.
First and foremost, we set out to define the process we wanted to automate within the SuiteCRM system. For existing data, we meticulously checked its accuracy, ensuring it aligns with our intended workflow. In the case of new processes, the data may not be present initially, allowing us to build it up from scratch.
Moving on to step three, we built the workflow, ensuring it reacts to the correct module and triggers at the designated timings. Finally, in step four, we conducted thorough testing to verify its functionality.
Take these steps, unlock automation’s potential, and watch your processes flourish. Until next time, happy automating!