SuiteCRM Workflows with Calculated Fields: Boost your SuiteCRM Efficiency
Learn how to use SuiteCRM workflow calculated fields to automate business processes, especially for complex calculations and functions.

Are you ready to take your SuiteCRM workflows to the next level?
In this guide, I’ll show you how to use calculated fields in SuiteCRM workflows to automate your business processes and make them more efficient.
Assuming your SuiteCRM system is up and running smoothly, and you’ve already set up basic workflows, it’s time to unlock the full potential of your workflows with calculated fields.
We’ve got a video that explains everything you need to know about SuiteCRM Workflow Calculated Fields. Check it out!
Now, let’s walk you through the 4-step process:
- Define the workflow.
- Check the data.
- Build the workflow.
- Test and deploy.
Step 1: Define the Workflow
Defining SuiteCRM Workflows for Effectiveness
So, let’s get started with the first step: defining the workflow.
I recently worked on a project where the customer wanted to send information about new leads via text message. However, I couldn’t use a table to put all the details inside. Instead, I needed to use a sentence that looked more human-like and similar to a text message.
Imagine you want to automate the process of sending text messages to new leads. When a potential lead submits a lead form expressing interest in your product or service, the SuiteCRM workflow steps in. One could segment the leads on only trigger then workflow, if the lead indicates a budget exceeding $10,000. The workflow generates a call, ensuring timely and personalized engagement with the high-value lead.
The message included important information such as “this lead has just been created with this lead source” and the phone number to call back.
So, when you’re defining your workflow, keep your objectives clear without the technical intricacies. Let’s make it simple, effective, and, most importantly, human.
Step 2: Check the Data
Checking the Data to Ensure Accuracy
Next, we’ll check the data.
Before diving into workflow creation, it’s important to ensure that essential information such as first name, last name, mobile number, and lead source are accurately captured and accessible within the CRM system.

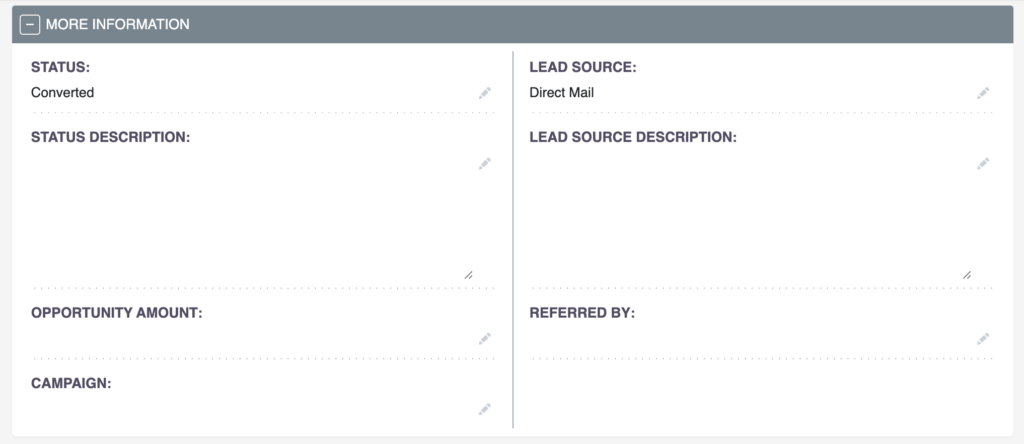
Now, let’s talk about why this is so important. By checking the data, we can create a neat sentence that can be sent via text message later on. We create this sentence to make it simple and easily understandable and store it in the description field for demo purposes.
In your system, you’d probably add a specific field “text message” or similar. Check out my article on SuiteCRM and fields: Supercharge Your SuiteCRM: Master Field Customization for Maximum Efficiency.
By ensuring accuracy, we can avoid mistakes and miscommunications.
I like to check the data in the systems, to make sure about the real world reality. It can always differ from what people believe should happen in the CRM system.
In order to dive deeper into data quality, read my article Visualize your Data Quality in SuiteCRM: A Guide to Assessing Data Accuracy.
Step 3: Build the Workflow
Adding the Workflow with Calculated Fields
Moving on to the third step, let’s add the workflow.
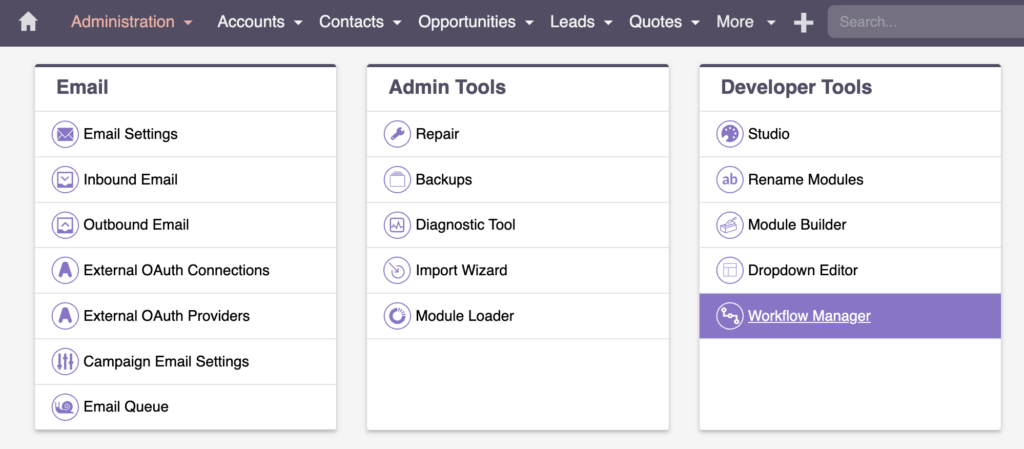
To add a workflow, we’ll navigate to the Admin area and access the Workflow Manager.
Now, let’s create a new workflow for generating the descriptive sentence.
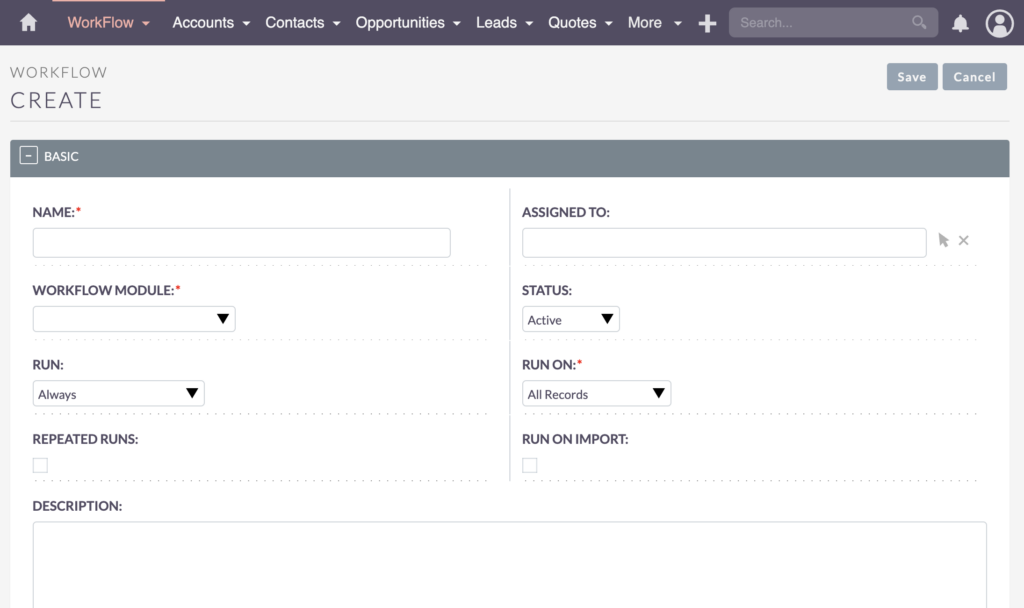
Essential Header Information and Fields
Provide a clear header explaining the purpose of the workflow, and define the specific fields involved in the workflow.
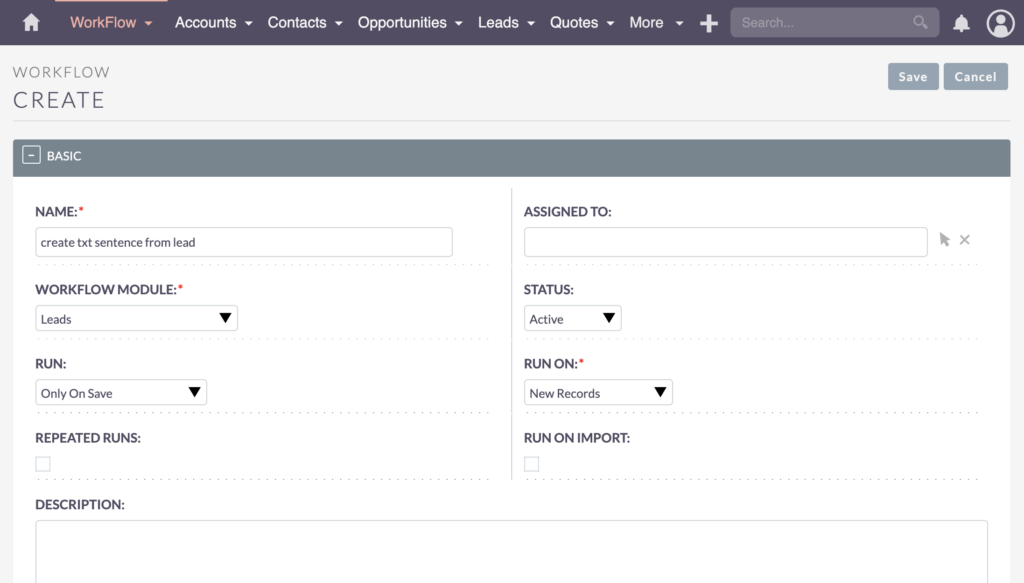
- Name – we’re aiming to generate a text sentence from new leads, so let’s name this “create txt sentence from lead” to clearly explain its purpose.
- Assigned to – when working with multiple admins or workflow builders, it’s practical to assign this task to the person who created the workflow for streamlined communication.
- Workflow Module – set this to “Lead” to ensure it’s triggered by the Leads module.
- Status – status is “Active.”
- You can set this to Inactive during imports to avoid unnecessary internal and external communication.
- Run – we’ll choose “Only On Save” since we’re creating a new lead, and the workflow will trigger only when a new lead is created.
- Run On – set this to “New Records” to ensure it runs only on new records, avoiding potential overload when modifying existing records or importing substantial data.
- Repeated Runs – If you wish to recalculate something every time a record is modified, that’s where the repeated runs option comes into play. This ensures the workflow adjusts dynamically with each record change.
- Run on Import – let’s consider running the workflow on import, especially when dealing with substantial data, like 5,000 new leads. It’s essential to exercise caution here; sending out 5,000 text messages might not align with your communication strategy.
Striking a balance is key, ensuring the workflow functions effectively without overwhelming your intended audience. With these considerations in mind, your workflow is now set to go.
For more details on the workflows, check out my article and video on SuiteCRM Workflow Basics: Your 4-Step Guide to Boosting Efficiency and Streamlining Processes.
Workflow Conditions

For demo purposes, I won’t be including any conditions for now, but it’s crucial to consider potential criteria. For instance, we might want to exclude all imported leads. That way, we can tailor our workflow to suit our specific needs.
Workflow Actions Using Calculated Fields
Using calculated fields, we’ll define the outcome—a cohesive sentence pulling information from lead parameters.
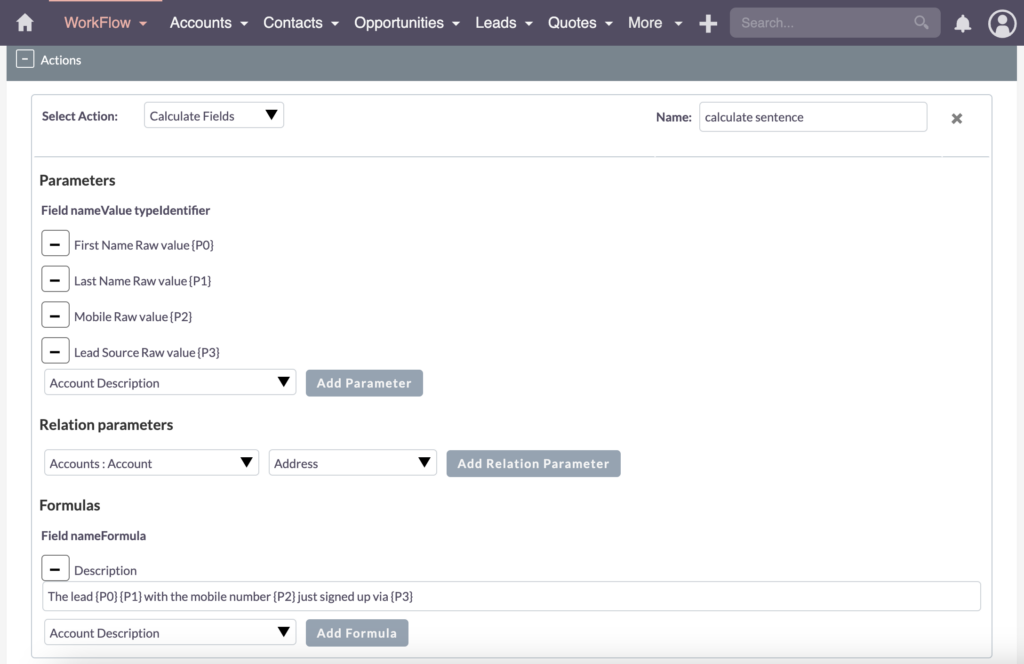
- Select Action: Calculate Fields
- Name: calculate sentence
- Add Parameters:
- First Name [P0]
- Last Name [P1]
- Mobile [P2]
- Lead Source [P3]
- Add Formula: Description
- Formula: The lead [P0] [P1] with the mobile number [P2] just signed up via [P3]
The key to this process lies in understanding parameters and how to manipulate them within the calculated fields. As demonstrated, we create a sentence by combining parameters like first name, last name, mobile number, and lead source. This sentence becomes a valuable asset for future actions, such as sending a text message.

Need to create a sentence or a message using info from different fields? Well, that’s where parameters come in handy! By using parameters in calculated fields, you can easily pull information from related entities and create sentences that are tailored to your needs.
Bastian Hammer
After saving the workflow we just created, it’s time to test it out!
Step 4: Test and Deploy
Testing and Deploying Your SuiteCRM Workflow Calculated Fields
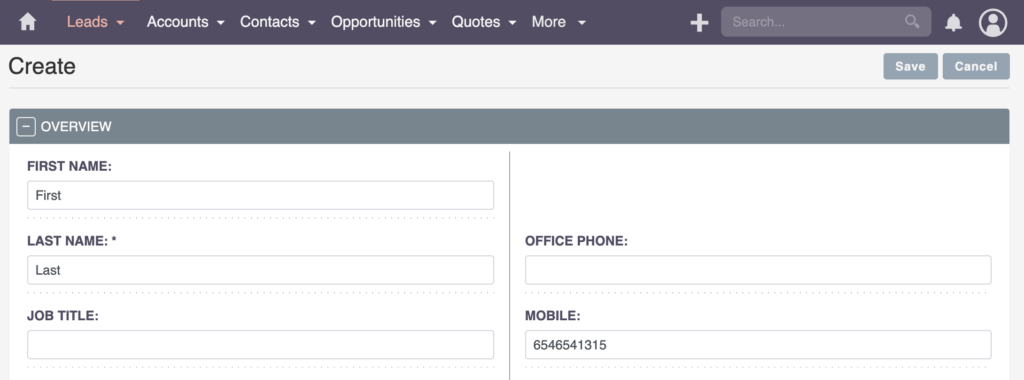
Finally, with the process defined and the data checked, it’s time to test and deploy the workflow by creating a new lead with relevant data.
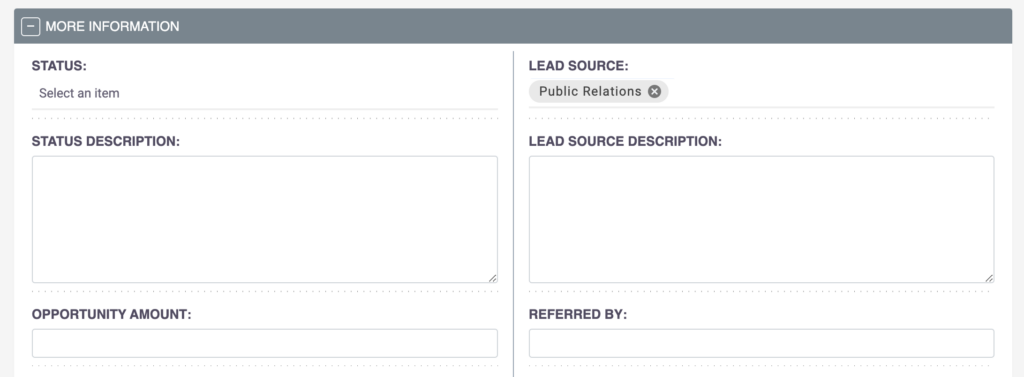
We’ll create a new lead with relevant data, such as first name, last name, mobile number, and lead source. For our example, let’s choose “Public Relations” as our lead source.
Click save, and the workflow will seamlessly produce the desired outcome.
As you can see, it has populated the description.
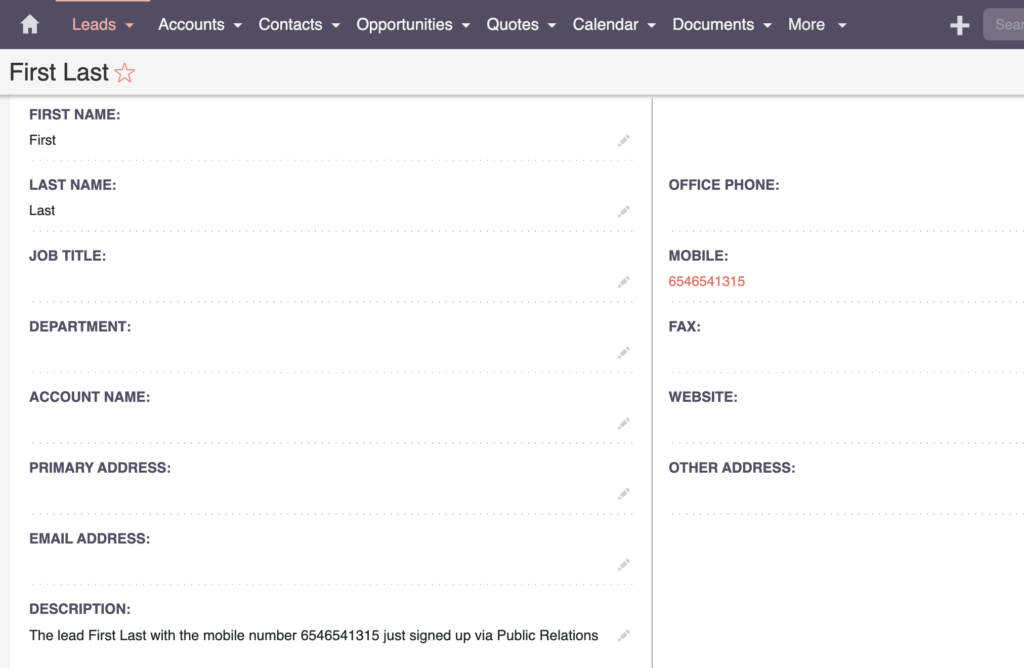
Voila! Our workflow has been successfully tested and deployed. That’s the power of SuiteCRM—we can create customized workflows that make our lives easier and streamline our business processes.
Going Beyond the Basics
Going Beyond the Basics with SuiteCRM Workflow Calculated Fields
You know how sometimes you need to do a bit of math or logic to get the data you want? That’s where Workflow Calculated Fields come in handy. Check out this SuiteCRM documentation for a detailed explanation, but let me give you a quick rundown.
First, let’s talk about parameters. You can extend them beyond leads and pull information from related entities. Pretty cool, right?
Now, remember the function. It’s not just about adding text; it can handle complex tasks. Multiplication, addition, division, and subtraction—SuiteCRM’s got you covered. There are logical functions too, checking equality, inequality, and greater-than scenarios. For a full overview, search for functions. Text, mathematical, and date functions provide a wide array of possibilities.
Let me share an example. In a project, we had leads assigned to salespeople based on postal codes. Using functions, we determined the starting digits of zip codes and allocated them to the right personnel. You can leverage this for lead distribution, scoring, or calculating KPIs. It’s powerful, but might seem complex initially with the syntax. Once you grasp the nesting and functions, it works smoothly.
Recap
So, let’s wrap up our SuiteCRM Workflow Calculated Fields journey!
We’ve created a workflow that generates a readable sentence from lead data, and we’ve walked you through the four-step process: defining the workflow, checking data, building the workflow (with calculated fields), and testing.
If you’re eager for more in-depth knowledge of workflows and automation in SuiteCRM, feel free to explore additional resources on my website and courses.
Thanks for reading my blog post on SuiteCRM Workflow Calculated Fields. I hope you find it informative and helpful. If you have any questions or would like to explore more, don’t hesitate to reach out. I’m always here to help!